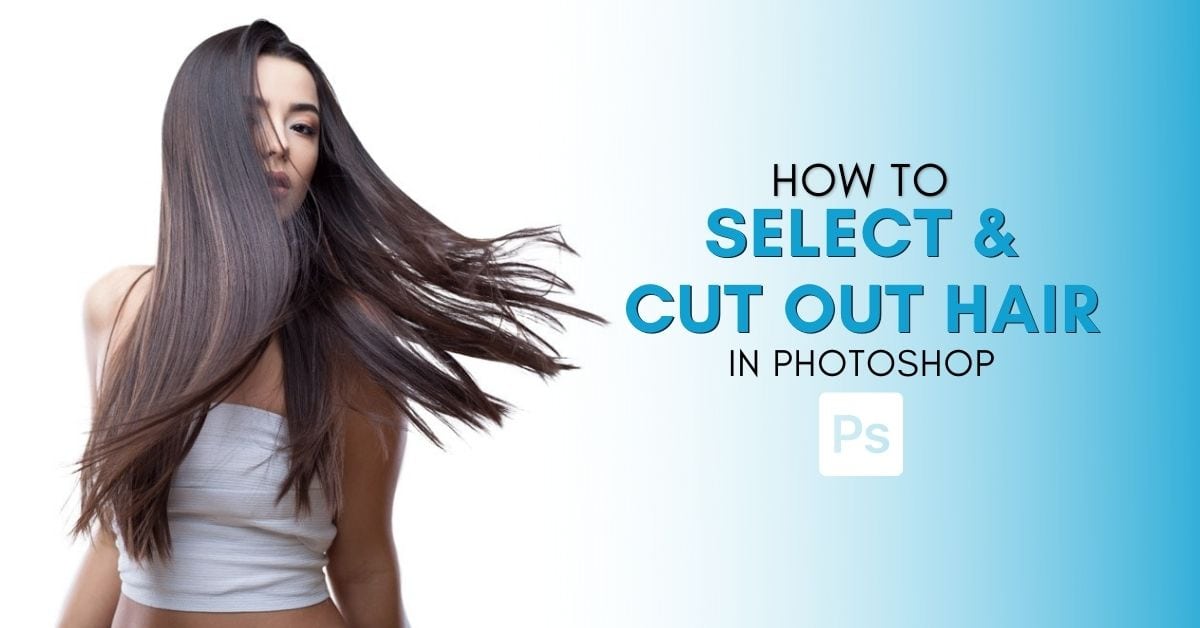
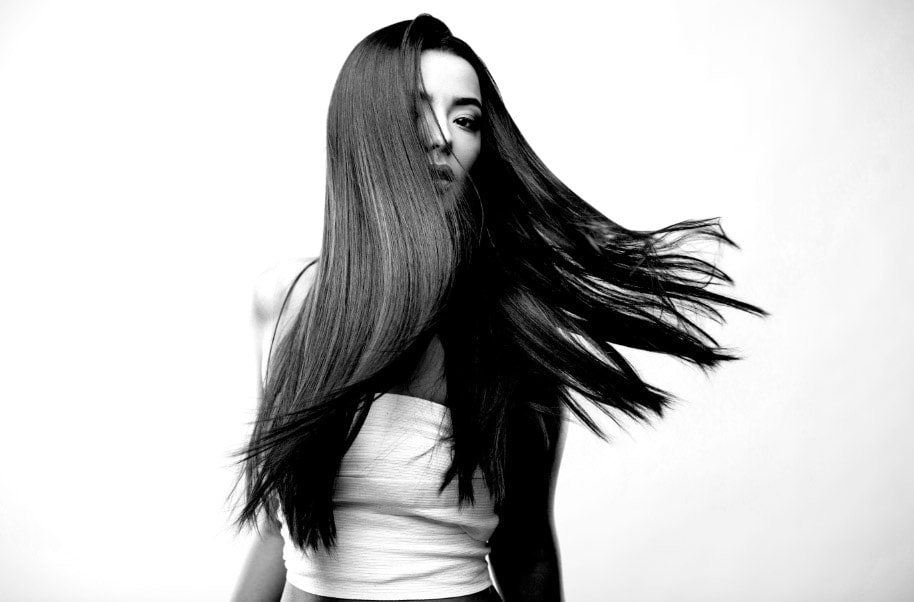
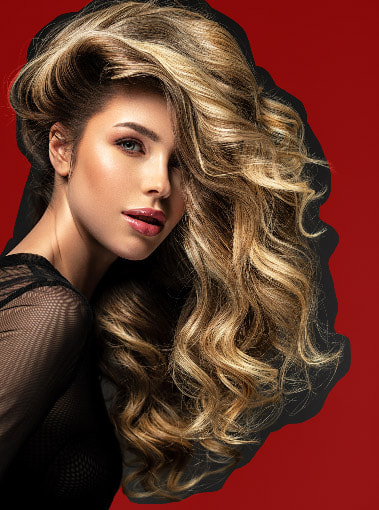
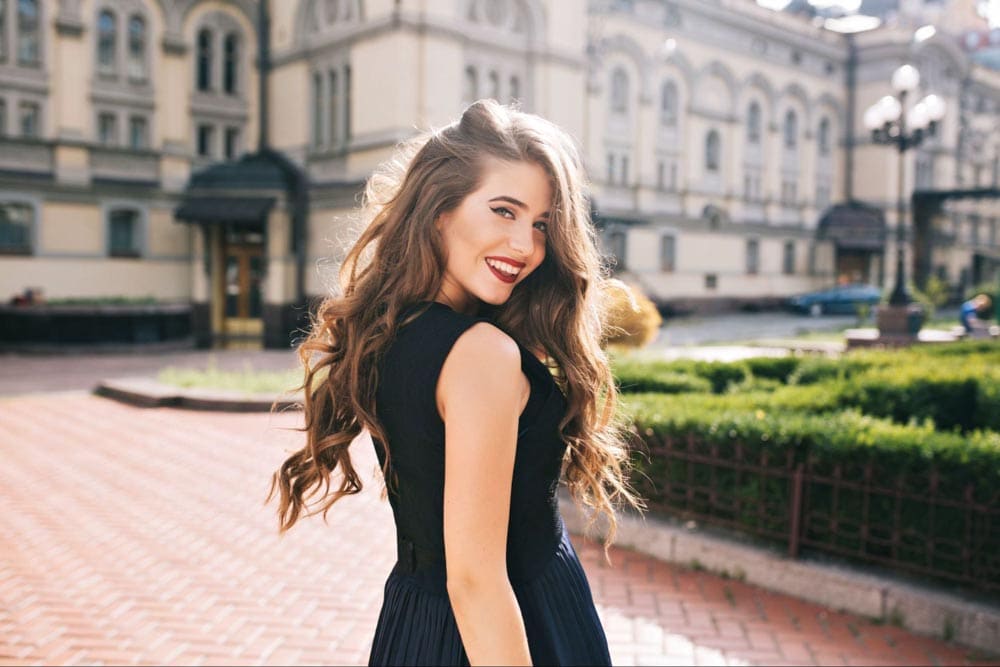
How To Select & Cut Out Hair
When I first tried to cut out hair in Photoshop I remember how impossible it felt. That’s because even if you have a solid understanding of the various selection methods in the program, dealing with the random and complex edges of hair is a completely different beast. Luckily after years of working in Photoshop, there are three go-to tools I regularly use that I know will get you the results you’re looking for too.
So in this tutorial, I’ll break down all three of these methods and how to use them yourself. If none of those methods work for you, you can try the alternative method I use for cutting out hair from complicated backgrounds later in this post.
So in this tutorial, I’ll break down all three of these methods and how to use them yourself. If none of those methods work for you, you can try the alternative method I use for cutting out hair from complicated backgrounds later in this post.
How To Cut Out Hair In Photoshop
Option 1: Channels
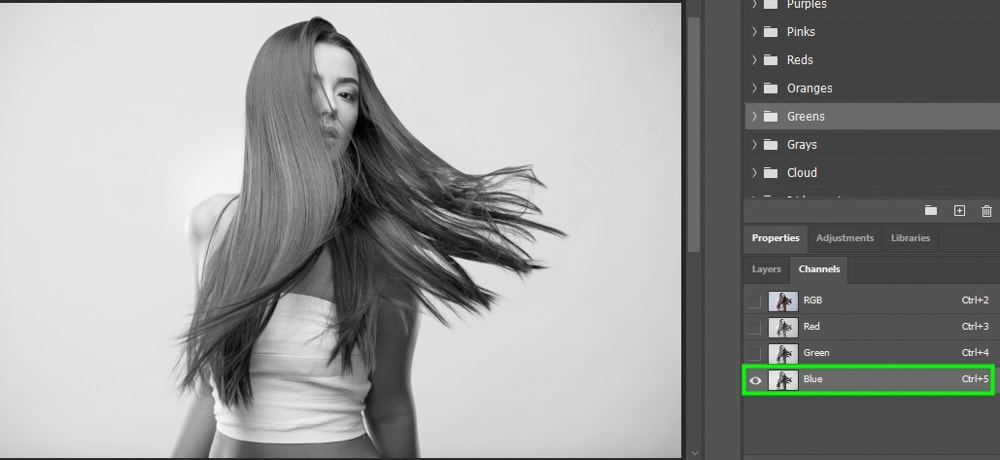
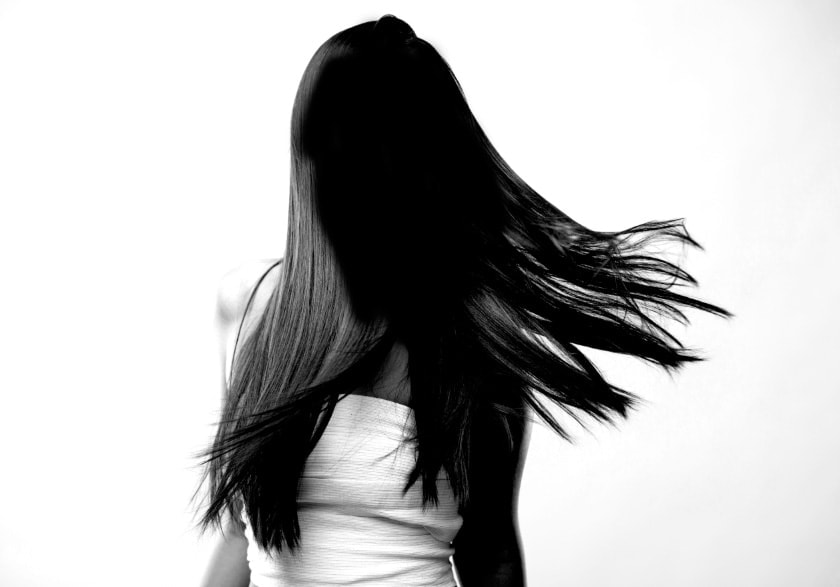
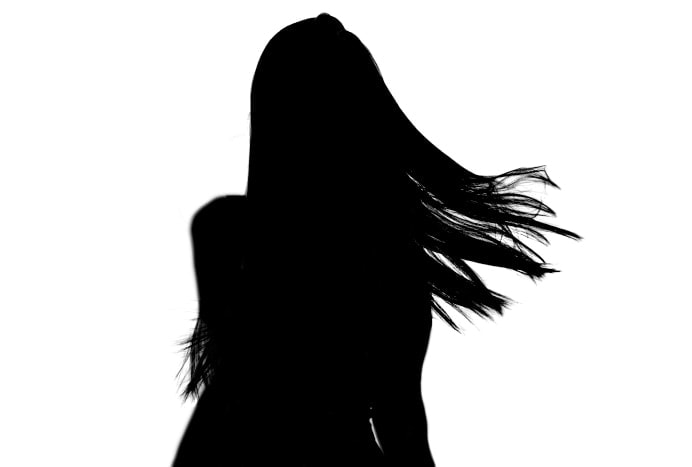
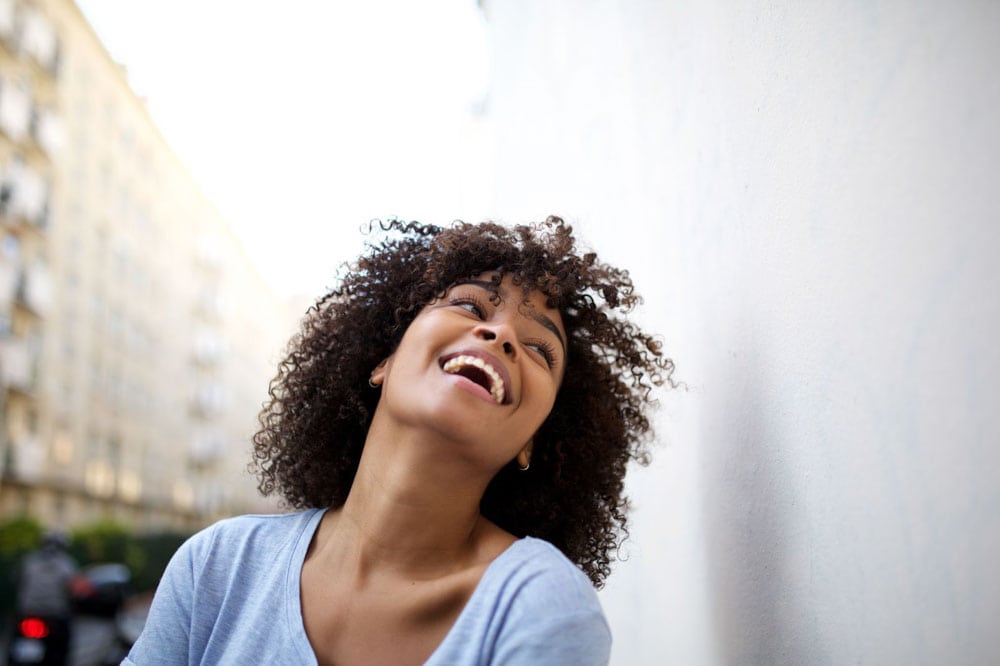
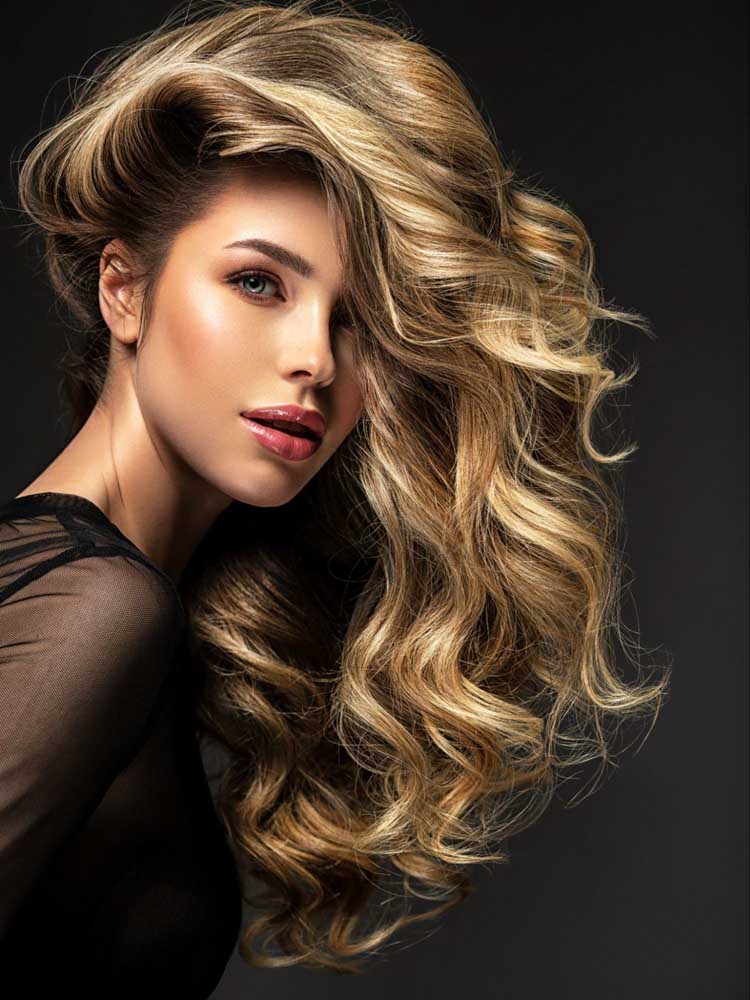
You can select complex objects in your images using channels to include the finer details. That’s why channels are one of the best methods for cutting out hair for images with lots of contrast between your subject and the background. For example, dark hair against a light background is an easy task to select and cut out using this method. Here’s how to use it.
Open the Channels panel, located next to the Layers panel, once your image is in the workspace.
Open the Channels panel, located next to the Layers panel, once your image is in the workspace.
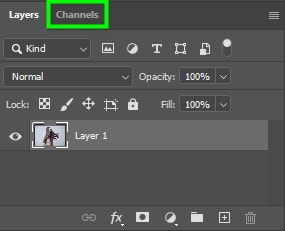
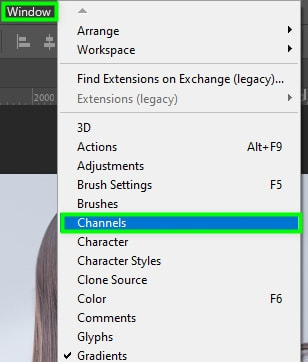
If you can’t see the Channels panel, go to Window > Channels.
You will see all the color channels that make up your image in this panel.
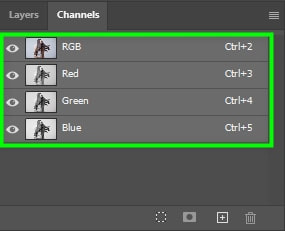
Click one channel after another to find out which one has the most contrast. The color channel with the most contrast will vary depending on the colors in your image. In my example, the channel with the most contrast is the Blue channel.
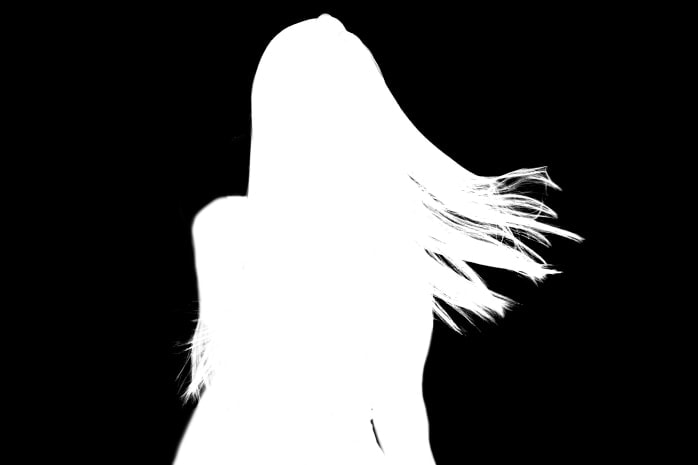
The key here is to make the background of your image completely white and the subject completely black. Once you have accomplished this, you can turn those colors into a selection and remove the image background.
The key here is to make the background of your image completely white and the subject completely black. Once you have accomplished this, you can turn those colors into a selection and remove the image background.
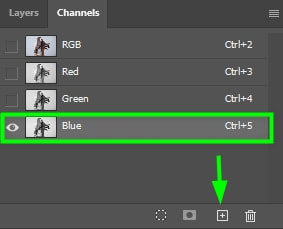
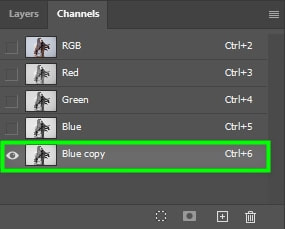
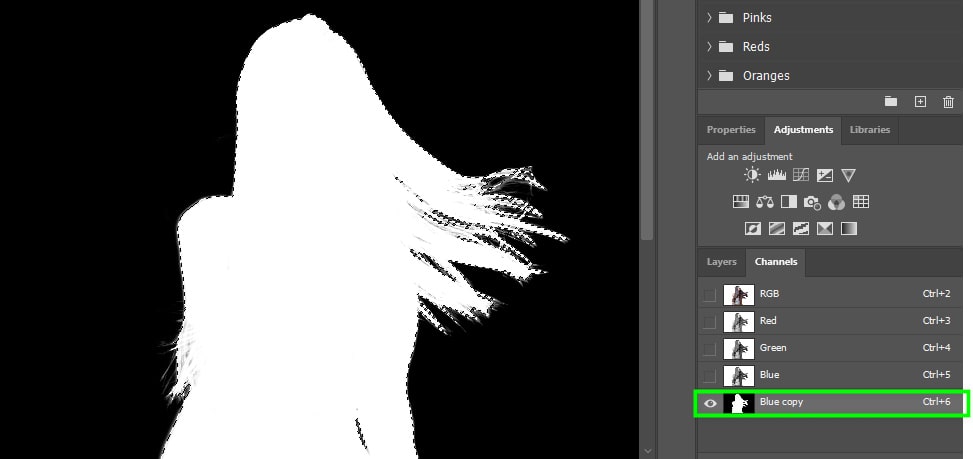
So after finding the channel with the most contrast, duplicate it by clicking the layer and dragging it towards the plus sign icon at the bottom of the Channels panel.
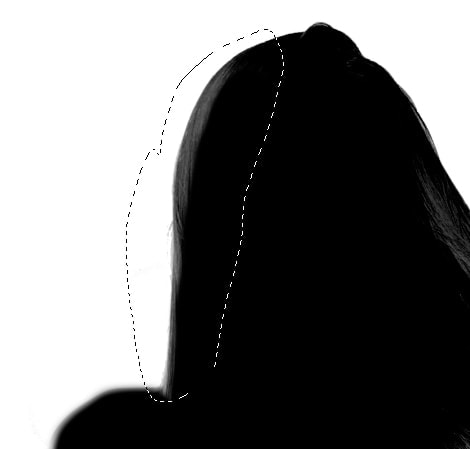
While making your selection using the channel, focus on the hair. Don’t worry about the rest of your subject’s body because you can always fix that later.
Since we need to increase the channel contrast so we are only left with 100% black and 100% white, we need to open the Levels panel. To do this, keep the layer copy selected and press Control + L (Win) or Command + L (Mac).
Since we need to increase the channel contrast so we are only left with 100% black and 100% white, we need to open the Levels panel. To do this, keep the layer copy selected and press Control + L (Win) or Command + L (Mac).
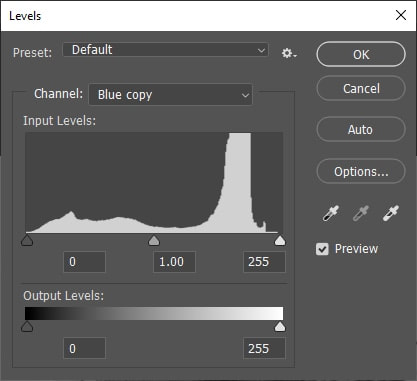
This panel controls the shadows and highlights of images. You can adjust these parameters using the arrows under the Levels panel histogram.
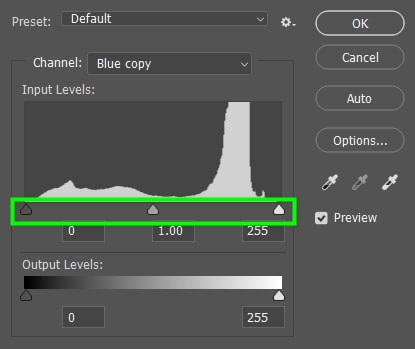
You only need to move two arrows to select your subject’s hair, the blacks, and the whites arrows. The black arrow controls the darkest tones in an image while the white arrow controls the highlights.
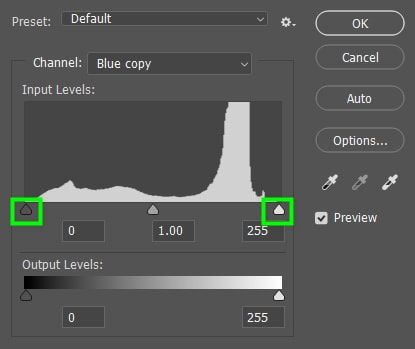
First, click the black arrow and move it to the right until the subject becomes as dark as possible.
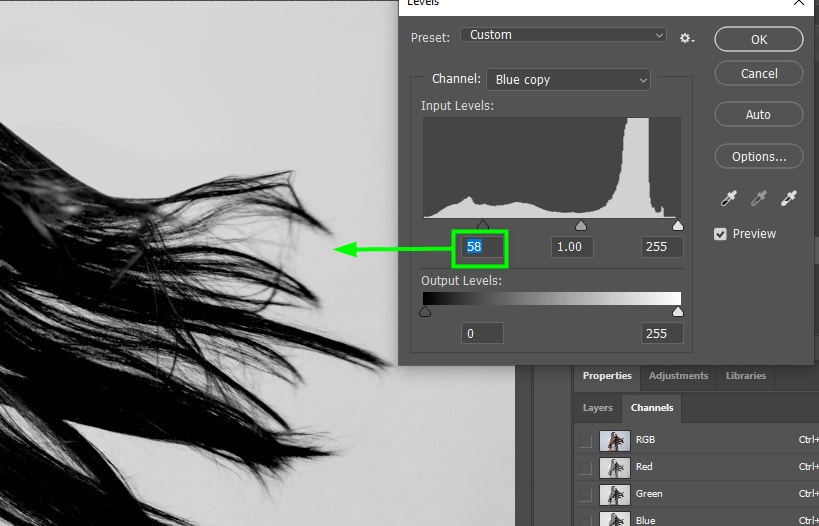
Zoom in on your image using Control + + (Win) or Command + + (Mac) and pay attention to the changes in the hair. Don’t move the arrow too much to the right; otherwise, you will lose hair details, which will result in an incorrect selection. In my case, 58 is enough.
Zoom in on your image using Control + + (Win) or Command + + (Mac) and pay attention to the changes in the hair. Don’t move the arrow too much to the right; otherwise, you will lose hair details, which will result in an incorrect selection. In my case, 58 is enough.
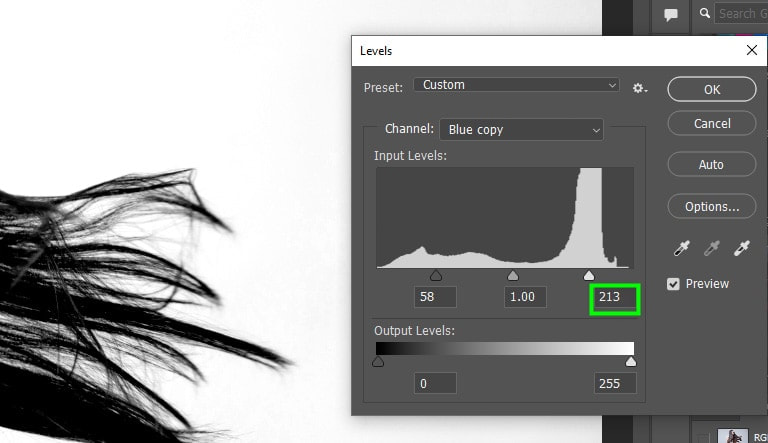
As for the white arrow, move it to the left until the background turns as white as possible. Stop moving the arrow when you notice the selection is affecting the hair. In my case, 213 was enough.
Once you have adjusted the levels, the contrast of the image will be much higher than before.
As you can see, the hair got a lot darker. However, the subject isn’t dark enough yet. To finish making your subject completely black, you have to paint it black manually.
To do this, go to the toolbar and make sure the foreground color is black. If not, double-click the foreground swatch and choose black from the color picker panel (#000000).
To do this, go to the toolbar and make sure the foreground color is black. If not, double-click the foreground swatch and choose black from the color picker panel (#000000).

Next, enable the brush tool by pressing B on your keyboard or selecting it from the toolbar.

Then, start painting your subject.
Everything must be black, especially the hair. To make your job easier, you can keep opening the Levels panel from time to time to darken some areas.
For example, while I was painting over my subject, an area around the hair edges was left out. It would be too hard to paint that area with the brush tool.
For example, while I was painting over my subject, an area around the hair edges was left out. It would be too hard to paint that area with the brush tool.
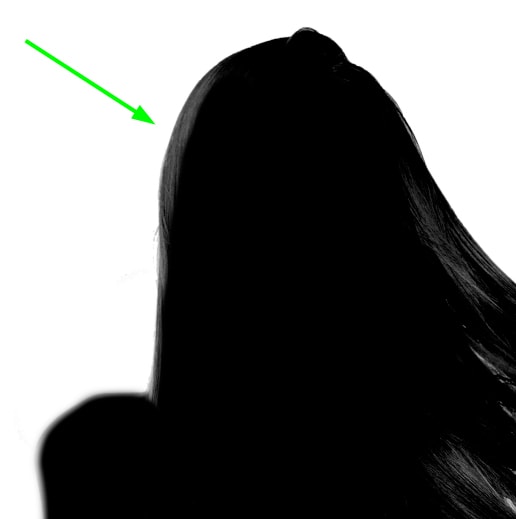
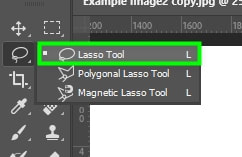
In such cases, you need to use the Lasso tool, which you can find in the toolbar L.
With the Lasso tool active, draw a selection around the target area.
Then, bring up the Levels panel using Control + L (Win) or Command + L (Mac) and darken the shadows, as you learned previously. The target area will turn black instantly.

Keep painting over your subject and darkening areas with the Levels panel until it is completely black.
Press Control + I (Win) or Command + I (Mac) to invert the channel when you’re done. This is necessary because selections with a channel work similarly to layer masks, so everything white becomes visible while everything black is hidden.
Next, turn your channel copy into a selection by holding Alt (Win) or Command (Mac) and clicking on the channel thumbnail to create a selection.
Then, click the RGB channel to convert your image back to color. Don’t worry, your selection will still remain active from before.

Then, go back to the Layers panel and click the layer mask icon to apply the active selection onto a layer mask.
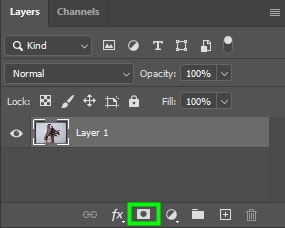
Clicking the layer mask will delete the background, after which you can continue editing or exporting the image.
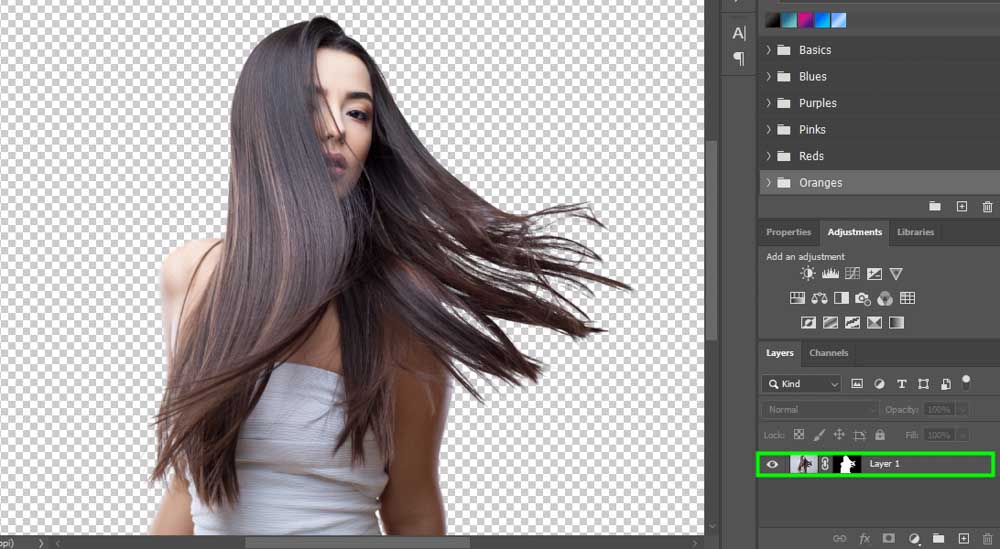
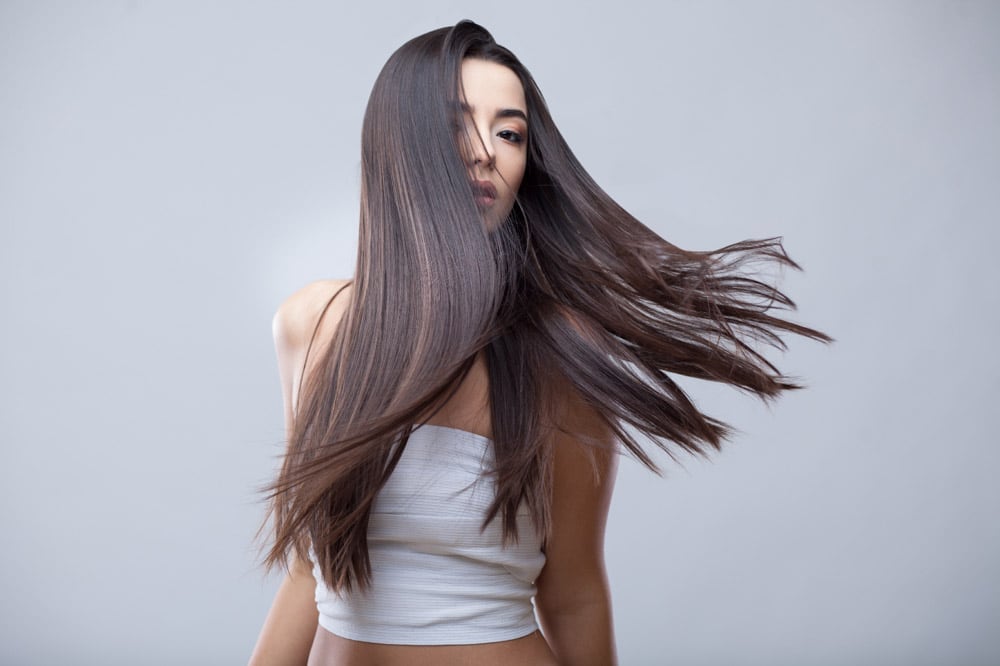
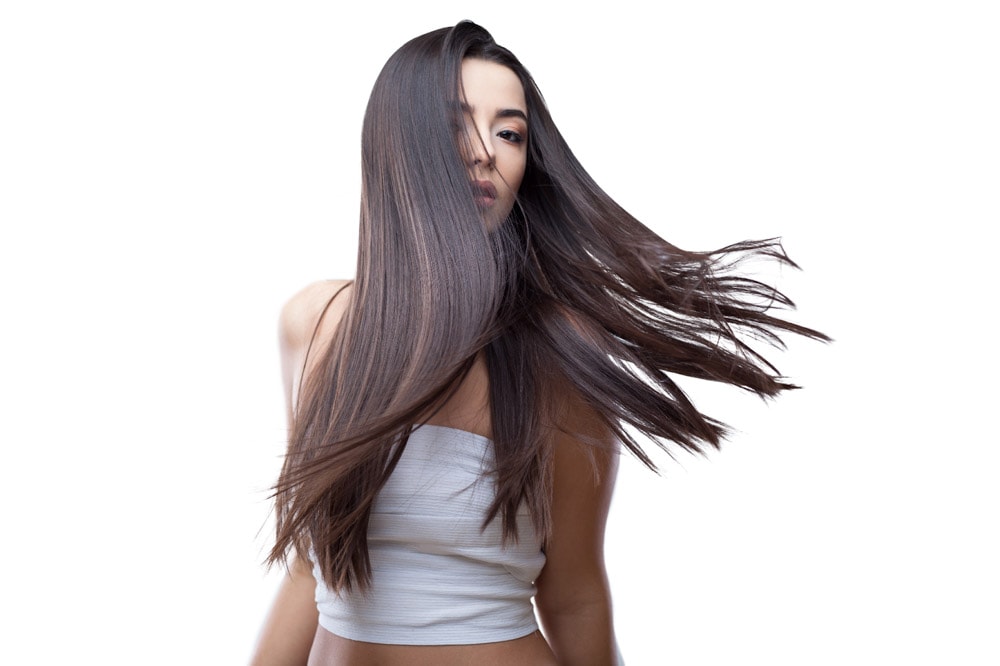
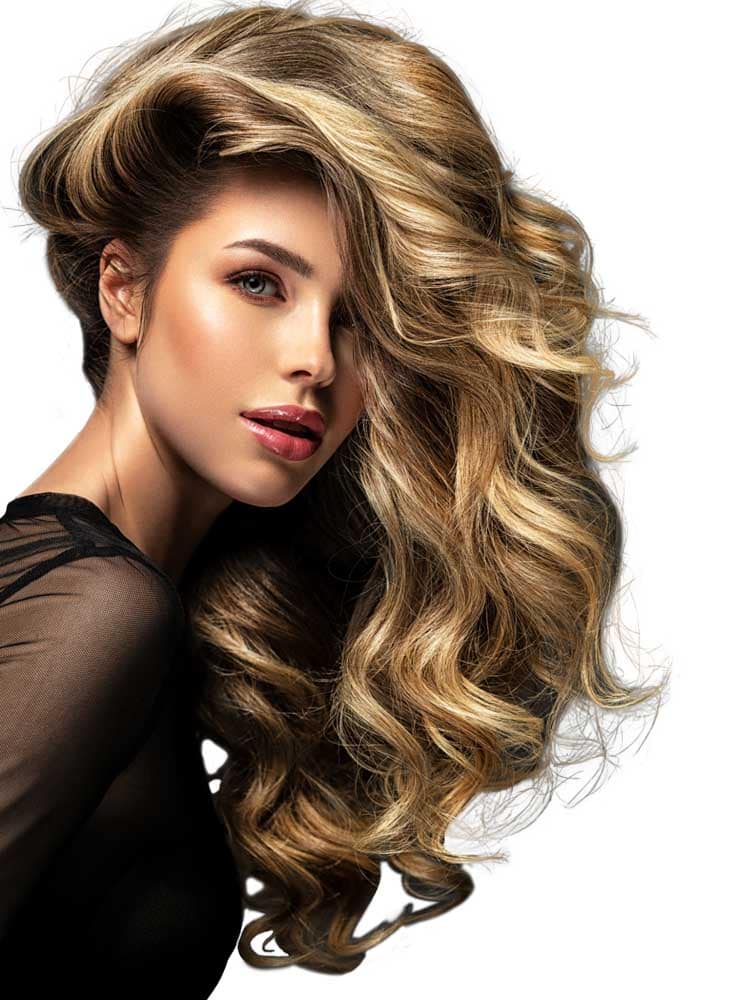
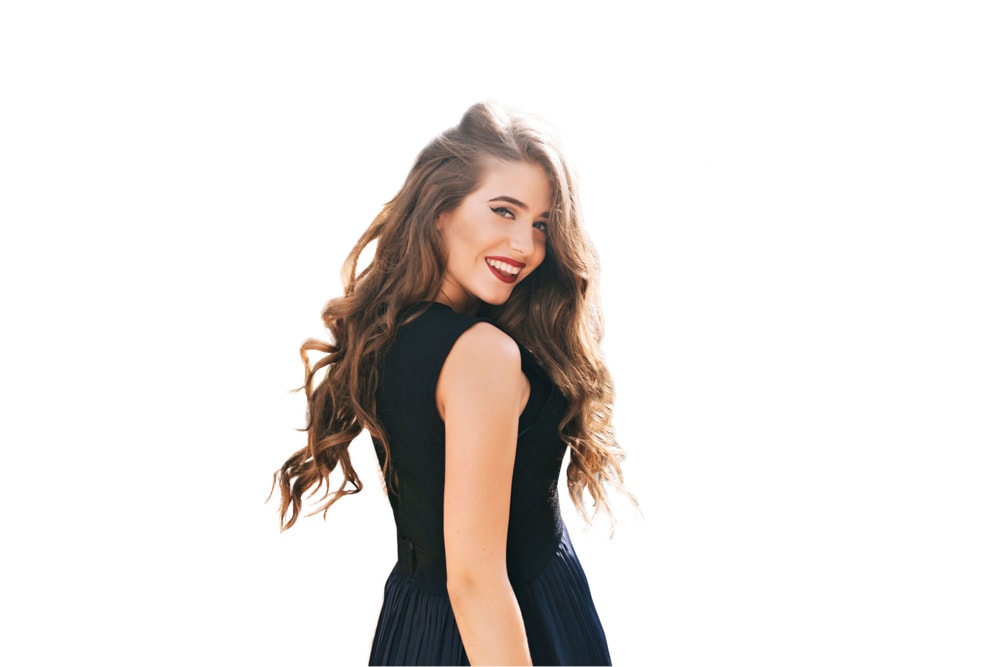
Once the subject has been selected and cut out of the image, you can add any background to the image, such as a white background. You can also save the image as a PNG file to retain transparency.
Option 2: Refine Hair |
|
This next method is all about using Photoshop artificial intelligence to select hair. It’s a convenient method, but because you are not completely in control of the process, the results may be undesirable if the subject is too complex.
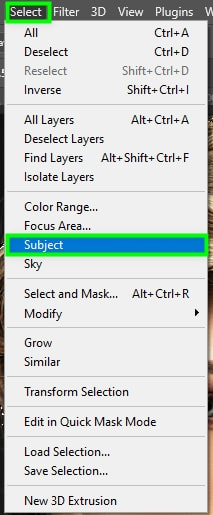
To use this method, open your image in Photoshop. Then, go up to Select > Subject.
To use this method, open your image in Photoshop. Then, go up to Select > Subject.
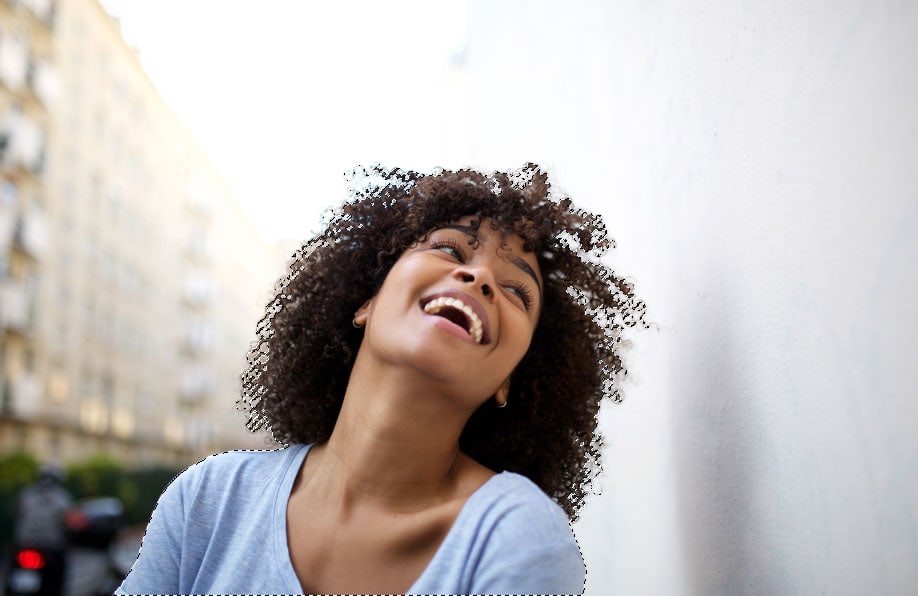
Selecting the subject will generate a marching ants pattern around it, indicating that it’s selected.
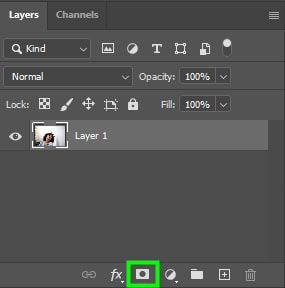
After that, go to the Layers panel and click the Layer mask icon to hide the background.
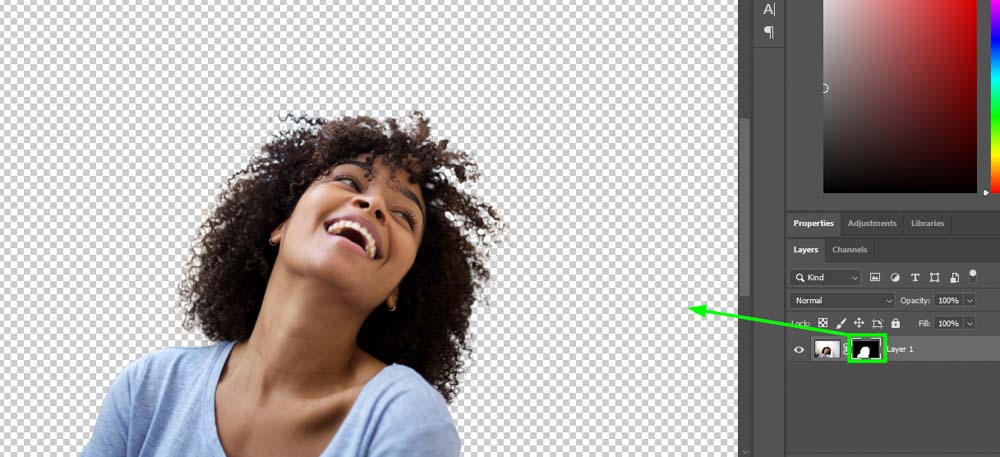
Then, double-click the layer mask thumbnail to open the Select and Mask workspace. Within the Select and Mask workspace, click the Refine hair button at the top of the workspace.

Once you have clicked this button, wait for Photoshop to refine your hair. The time will vary depending on your computer speed and how complex the subject is.
Because this is an automatic process, the results are not always perfect. Nonetheless, when the tool works, it can do 90% of the job of selecting hair. Although it doesn’t do the greatest job against complex backgrounds, it does work well when the hair is clearly defined.
Because this is an automatic process, the results are not always perfect. Nonetheless, when the tool works, it can do 90% of the job of selecting hair. Although it doesn’t do the greatest job against complex backgrounds, it does work well when the hair is clearly defined.
Option 3: Select And Mask |

|
Unlike the Refine Hair method, the Select And Mask method involves manual selection. This method gives you a lot more control over your selections.
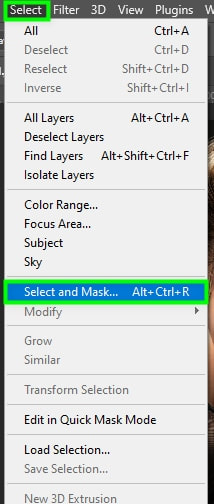
To use this method, first, open your image in Photoshop. Then, go up to Select > Select and Mask or use the shortcut Alt + Control + R (Win) or Option + Command + R (Mac).
To use this method, first, open your image in Photoshop. Then, go up to Select > Select and Mask or use the shortcut Alt + Control + R (Win) or Option + Command + R (Mac).
From the Select and Mask workspace, you need to adjust some settings in the Properties panel. First, change the View Mode to Overlay.
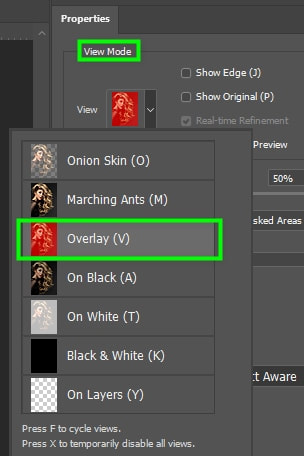
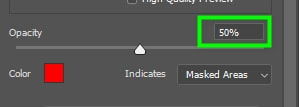
You can leave the view mode opacity at 50% to better see the subject and its background while making your selection.
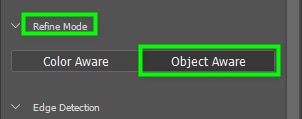
Next, set the Refine Mode to Object Aware since it’s the best mode for selecting hair. You can play around with both modes, though, and see which one works best for your image.
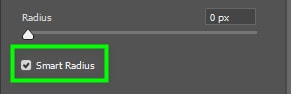
Then, check the Smart Radius checkbox. This option helps you make better selections by using Photoshop artificial intelligence to detect the edges of your image.
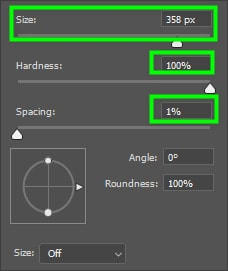
Now, go to the left side of the workspace and grab the Brush tool (B).

the size slider to the right. Next, set Hardness to 100% and the Spacing to 1%.
Then, paint over the subject in your image, starting from the center.
Paint the entire area around the subject and the hair. You don’t need to be precise at this stage
After that, grab the Refine Edge Brush tool on the left side of the screen.

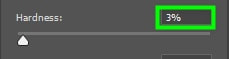
Then, use the brush tool settings to set the hardness between 1% and 10%, depending on how thick the strands of hair you want to refine are. As I wanted to refine very thin strands of hair, I set my brush hardness to 3%.
If you need to decrease brush size, use the left bracket key [ on your keyboard, and press the right bracket key if you need to increase it ]. Then brush around the edges of the hair, to move the edge of the selection inwards.
|
|
Once the hair is selected and refined, go to Output Settings in the Properties panel and choose New Layer With Layer Mask.
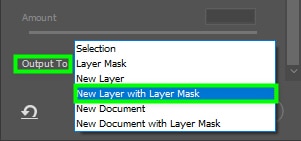
The Output To option will place your selection within a layer mask and remove the background. You can then add a white background to the image.
|
|
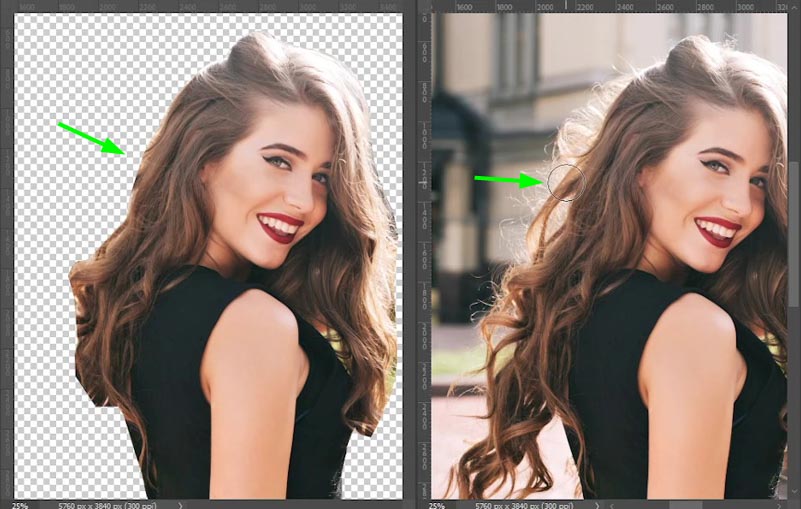
How To Cut Out Hair From Complicated Backgrounds In Photoshop
There are times when none of the above methods to cut out hair seems to work, especially when trying to cut out hair from an image with a complex background.
Luckily, there are some alternative methods you can try where you manually paint back strands of hair for a realistic cutout. Don’t worry, this process is a lot less labor-intensive than it sounds.
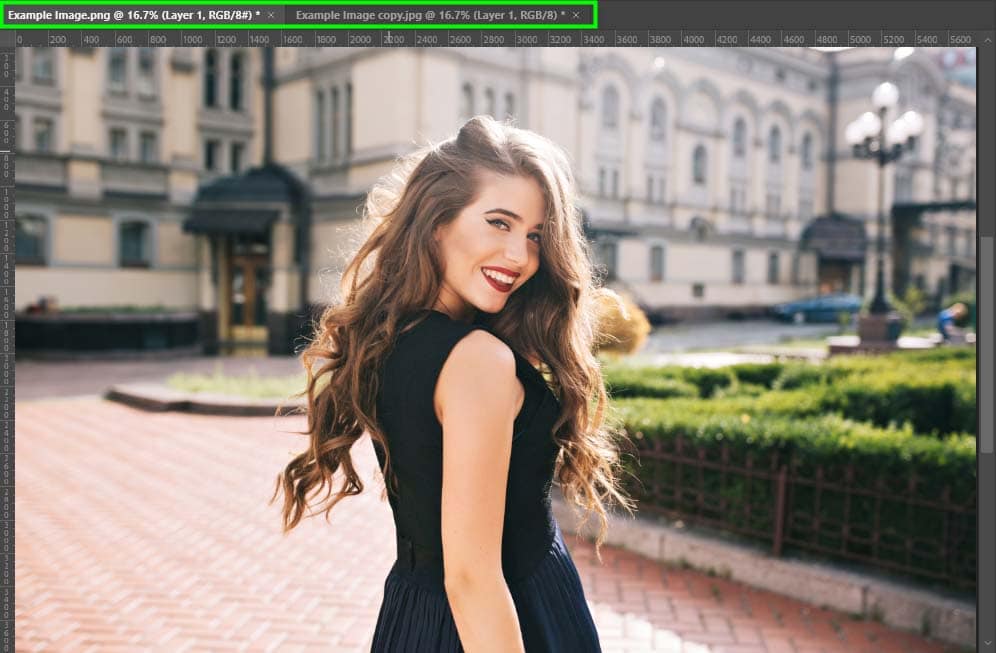
First, make a copy of your image and open both the image and its copy in Photoshop in different tabs.
Luckily, there are some alternative methods you can try where you manually paint back strands of hair for a realistic cutout. Don’t worry, this process is a lot less labor-intensive than it sounds.
First, make a copy of your image and open both the image and its copy in Photoshop in different tabs.
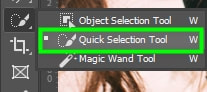
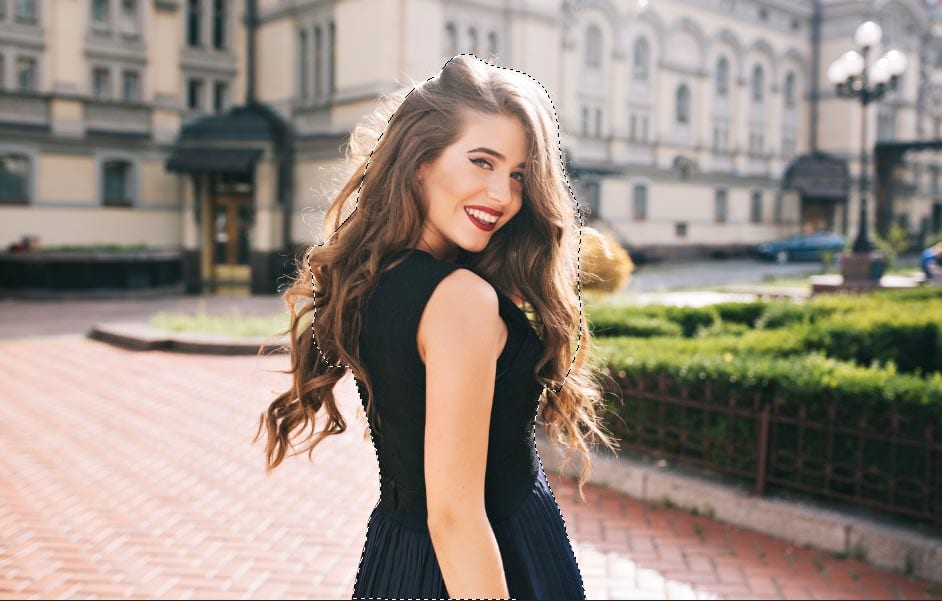
Next, open the original image tab, and make a rough selection of your subject with the tool of your preference. In my case, I used the Quick Selection Tool (W) found in the toolbar.
It’s not a big deal if some hair strands get left out of the selection because you will bring them back with the Clone Stamp Tool.
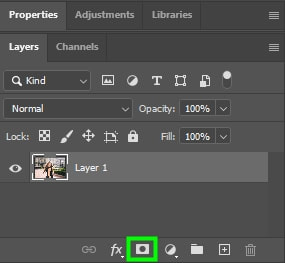
Next, go to the Layers panel and click the layer mask icon to hide the background.
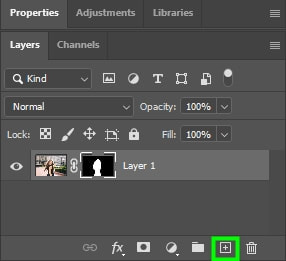
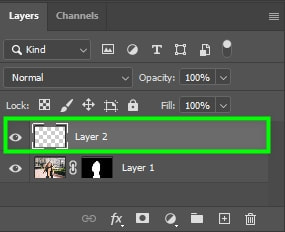
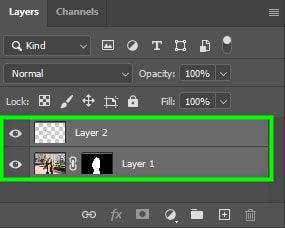
Still, in the Layers panel, create a new layer by clicking the plus sign icon at the bottom of the panel.
Then, go up to Window > Arrange > 2-Up Vertical.
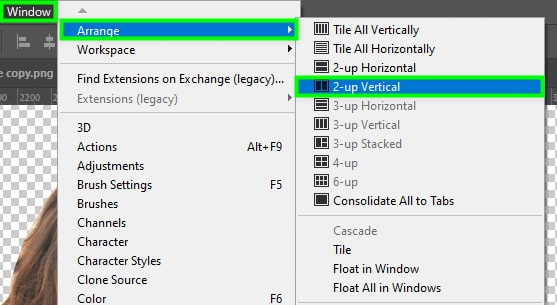
Arranging the workspace like this will split it in two, making both open images visible at the same time.
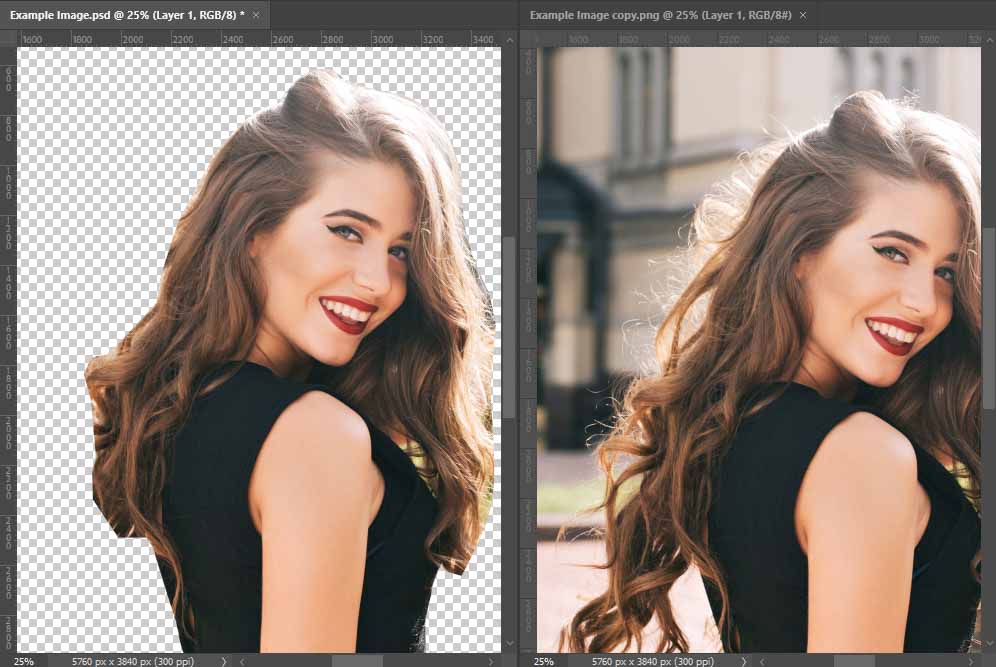
Now, select the image copy on the right, and enable the Clone Stamp Tool by pressing S on your keyboard.
Then, position your cursor on the area you want to clone. The key here is to use the image copy to fill in missing pixels in the original photo.
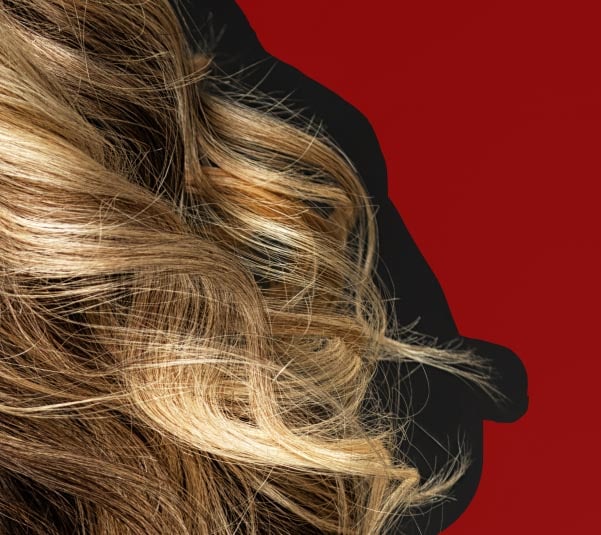
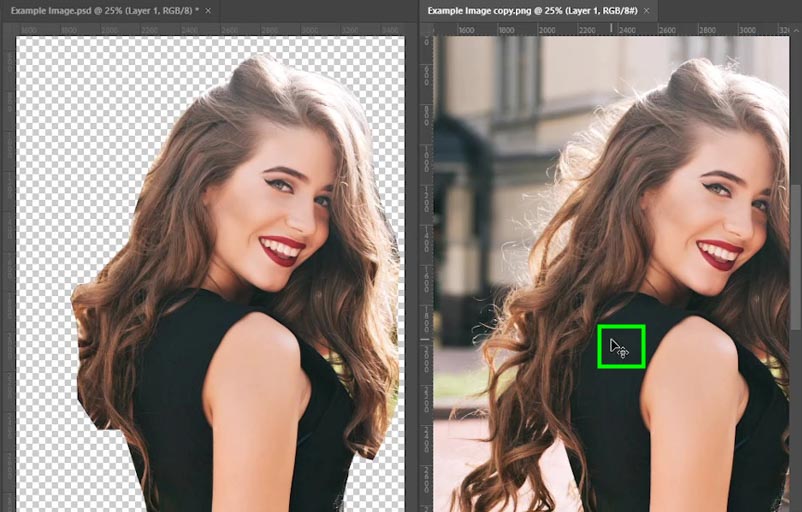
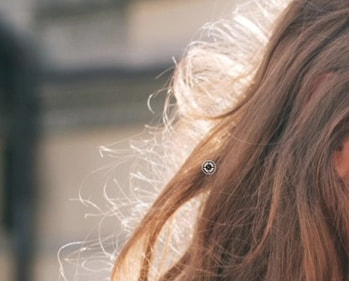
For example, the hair strands highlighted in the image below are missing in my original image thus, I will draw such content from the image copy.
For example, the hair strands highlighted in the image below are missing in my original image thus, I will draw such content from the image copy.
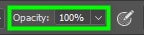
But before sampling the source area, you need to adjust the clone stamp settings. To do this, go to the Options bar and set the Blending Mode to Normal.

Then, set Opacity to 100%.
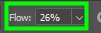
As for Flow, I recommend a value of around 26% for thick hair strands and 2% for thin hair strands. Setting a low value for flow helps with precision and blends the copied pixels with the rest of your image.
Next, ensure Aligned is checked and set Sample to All Layers.

After adjusting all the settings, position your cursor on the area you want to copy pixels and hold Alt (Win) or Option (Mac). Then, drag around the same area to sample the desired pixels.
After sampling the pixels you need, keep the stamp tool active and select the original image.
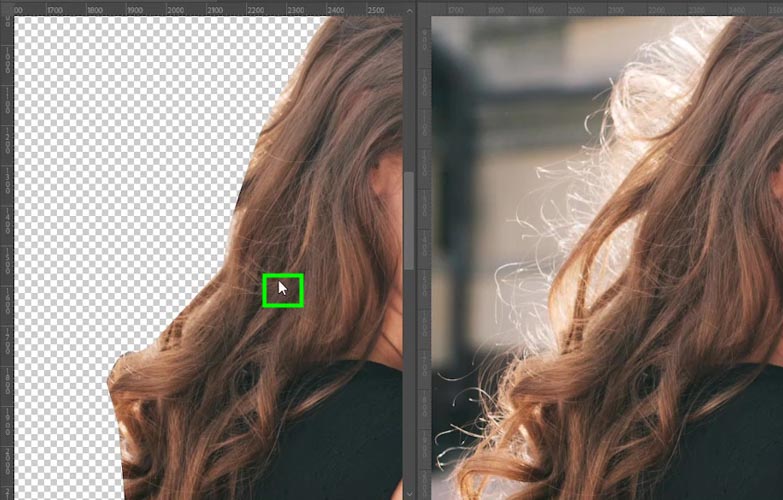
Then, go to the Layers panel and select the blank layer you created.
After that, paint over the target area to paste the pixels you copied.
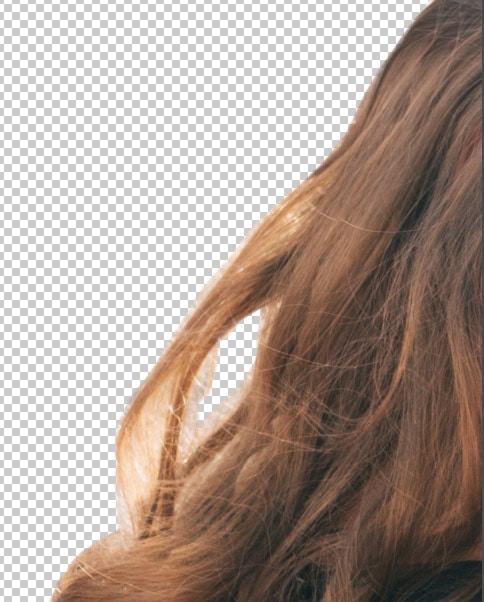
Keep cloning hair strands until you cover the whole hair area. Close the image copy tab after copying and pasting all the pixels you need. Then, go to the original image tab.
Select both the image and the blank layer you created from the Layers panel by clicking one layer after another while holding Shift.
Select both the image and the blank layer you created from the Layers panel by clicking one layer after another while holding Shift.
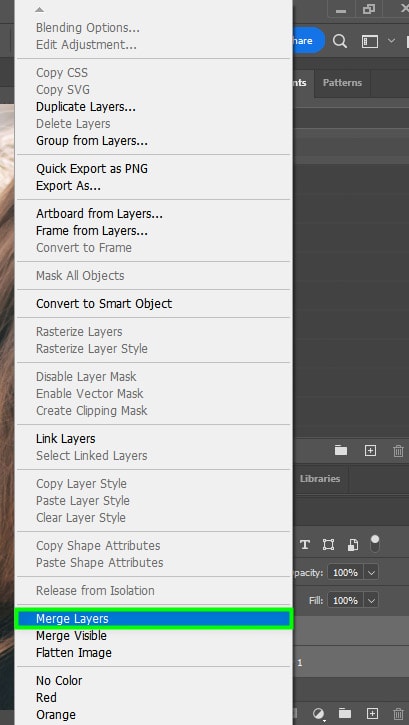
Then, right-click (Win) or control + click (Mac) any of the layers and choose Merge Layers.
After that, you can save your image or edit it further, like by adding a simple white background. In this example, I did a quick clone adjustment to get the larger strands of hair back. However, you can go through with a very small clone stamp brush and manually paint flyaways back into your image for an ultra-realistic result too.
|
|
These are a few helpful tools to cut out hair in Photoshop and help you get more precise selections. Now to further your selection skills in the program, check out this next tutorial on the best ways to cut out people and objects in Photoshop.
Happy Editing!
Happy Editing!