Cold Snowy Winter Scene Tutorial
|
In this tutorial I’m going to walk you through my process and the techniques I used to create this nice cold winter portrait.
|
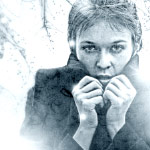
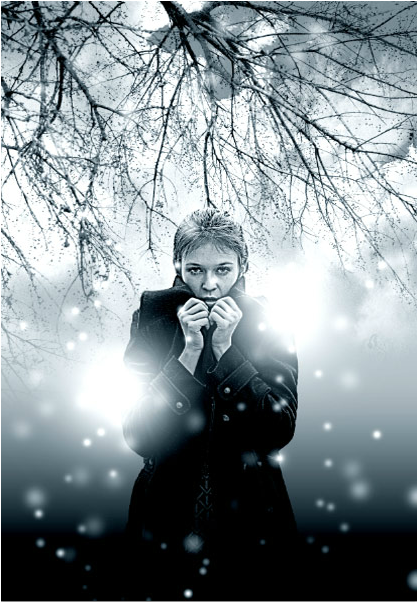
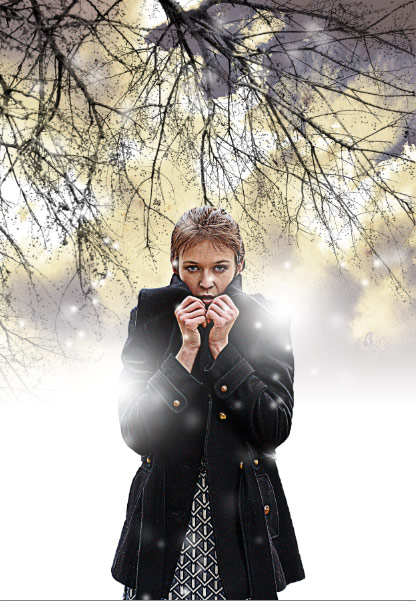
Preview
Below is a preview of what we’ll be creating. It already feels cooler in here, doesn’t it?
Step 1
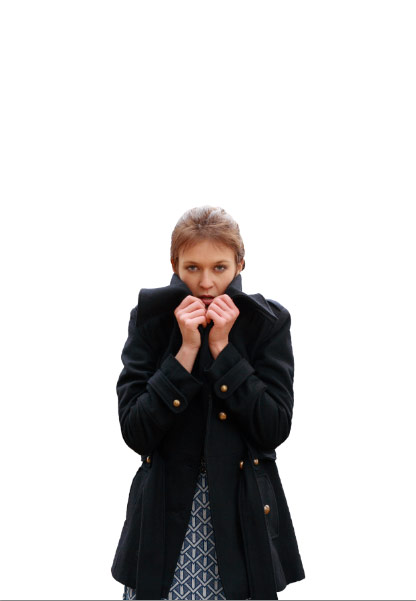
First off I knew that I wanted a person in this scene. Someone who’s nice and bundled as if they’re standing out in the cold. After some searching I found a great pic that you can grab below:
| model.jpg |
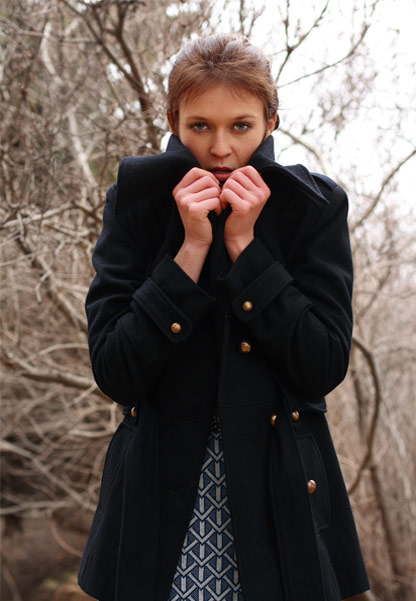
After staring at the image for a bit and visualizing the potential. I decided to cut the girl from the background. I did this by using the quick selection icon and carefully selecting the girl. You will need to copy your selection (ctrl + C).

STEP 2
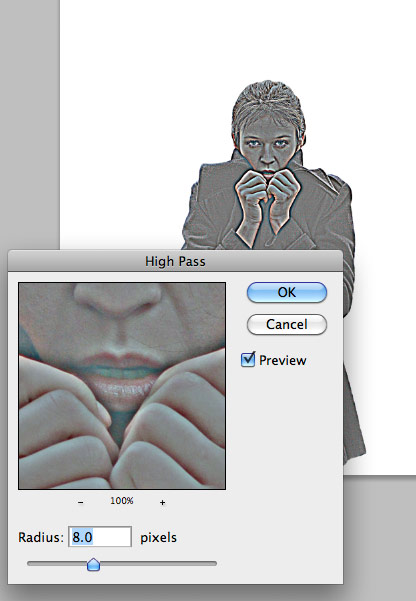
Next we need to create a new canvas and paste the girl cut out onto it. Let’s create a new file at 2500×3600 300dpi. Add the girl to a new layer.
Let’s go ahead and sharpen her up a bit by duplicating her layer and going to Filter / Other / High Pass set the Radius to around 8.0.
Step 3
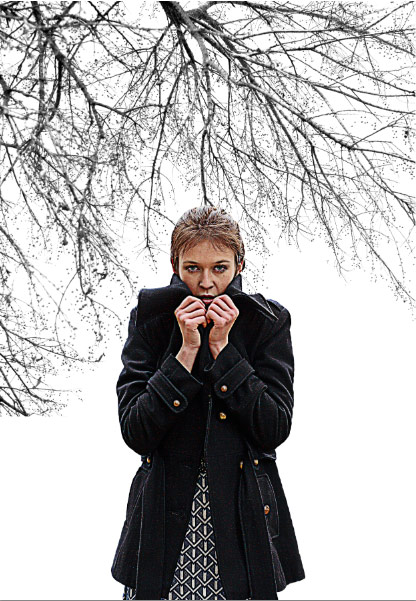
Now I want to start adding to the background. Download the .psd file below and drag the layer into your master canvas putting it behind your model layer.
| tree_branch.psd |
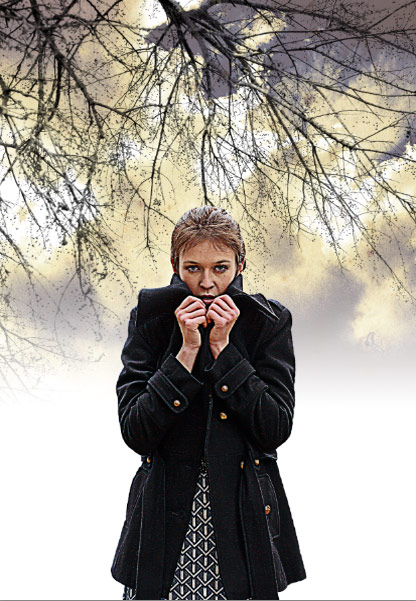
Then I added some clouds by downloading the image of the clouds below and dragging it into the master canvas making it the most bottom layer.
| clouds.psd |
To finish out the background I added a simple white gradient(using the gradient tool) to the bottom to remove the hard edge created by the tree branches and sky image.
STEP 4
I like where this is going so far. Now I want to start thinking about the foreground. I know I want to add some snow and maybe and other elements to make the image appear even more cold.
But first I want to add some light from behind the girl. I did this by simply creating a new layer above hers and clicked around her shoulders using a large soft white brush. I only clicked twice with two slightly different sized brushes.
But first I want to add some light from behind the girl. I did this by simply creating a new layer above hers and clicked around her shoulders using a large soft white brush. I only clicked twice with two slightly different sized brushes.
step 5
Now it’s time to add some snow. This is my favorite part. I do this by creating a custom scatter brush. Start by choosing a soft white brush around 60 pixels. Then open the brush controls, and modify the settings as follows.
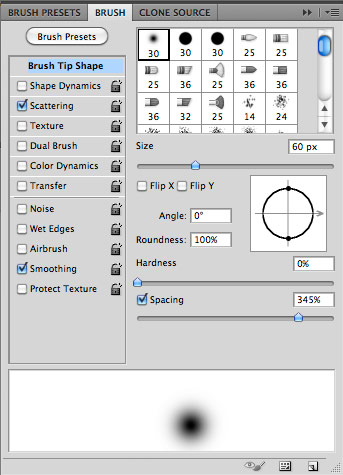
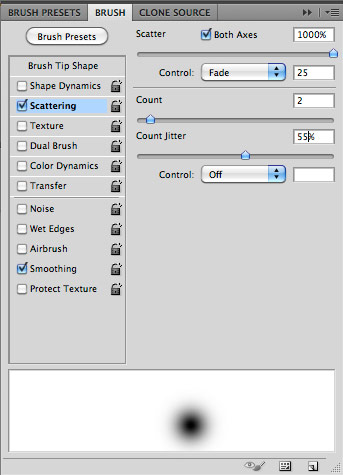
The trick here is to be subtle. It’s easy to go overboard because painting with scatter brushes can be a lot of fun.
I added two layers for my snow. One at 60px and one slightly smaller. I added some Gaussian Blur to the layer containing the 60px snow so that it appears more in the foreground of the camera and out of focus.
I added two layers for my snow. One at 60px and one slightly smaller. I added some Gaussian Blur to the layer containing the 60px snow so that it appears more in the foreground of the camera and out of focus.
step 6
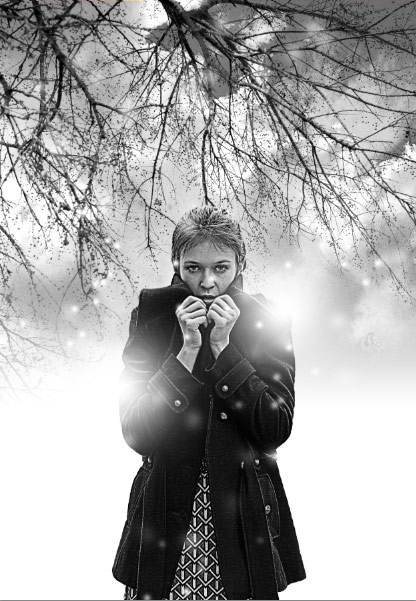
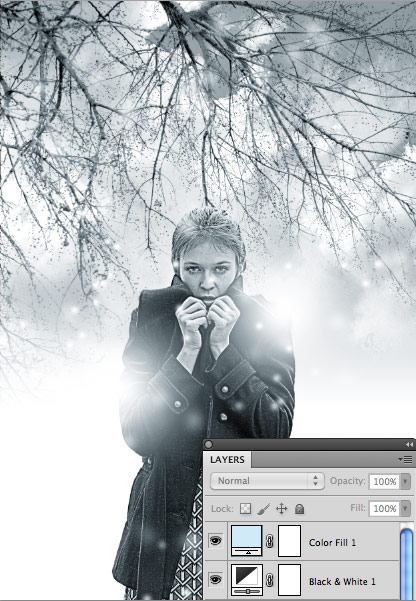
Now it’s time to start adjusting the mood with some color. I did this by first making the entire image black and white. I created a new B&W adjustment layer and moved it above all other layers.
That looks good, but I want to add a slight blue hue to the entire scene to make it feel even colder. I then created a new color fill adjustment layer set to #cceaf8. and moved it above the B&W adjustment layer.
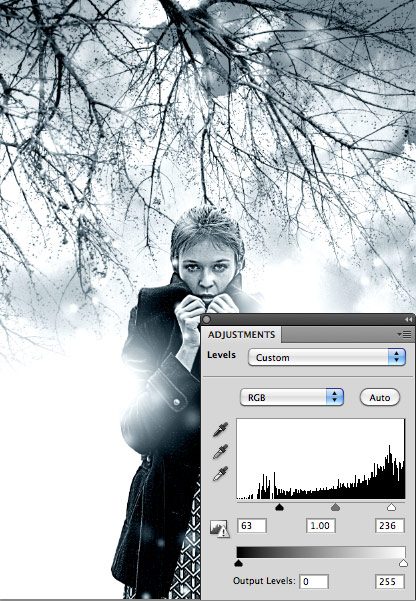
I like that… But I want a little more contrast in the scene, so I add one more adjustment layer. This time I use Levels to adjust the contrast using the settings below.
step 7
After looking at this stage for a bit, I decided that I want more of my snow to be visible. To make that I happen, I added a simple black gradient in a new layer above the girl.

I hope you found the process interesting and picked up some new and useful techniques from this tutorial. And for those of you in parts of the world where it is incredibly hot right now… I hope it cooled you off just a little bit. :-)