Forgotten Halloween Tutorial

Required Resources
Step 1
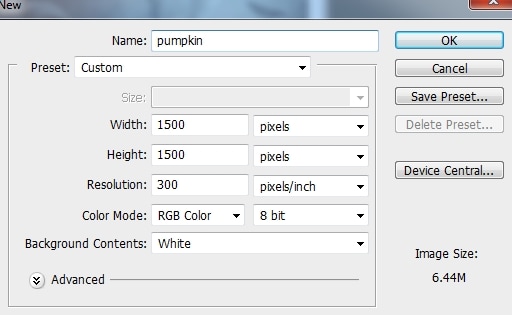
Create a new document in Photoshop with the settings below:
Step 2
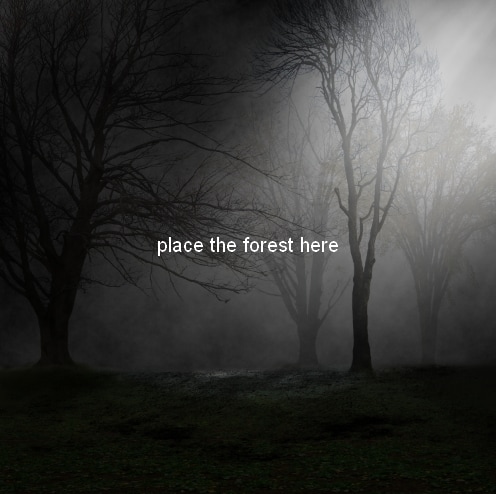
Open the forest stock. Drag it into our white canvas using the Move Tool (V) and scale it down it to fit the document. Right click on the layer and covert it to a Smart Object.
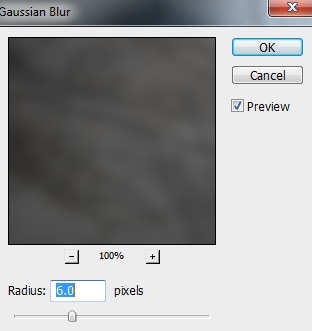
To add some depth to the scene, go to Filter > Blur > Gassian Blur and set the radius to 6 px:
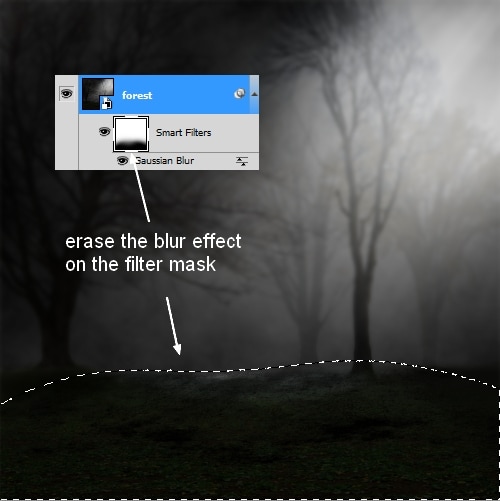
On the Filter Mask use a basic, soft brush with black color to erase the blur effect on the foreground:
Step 3
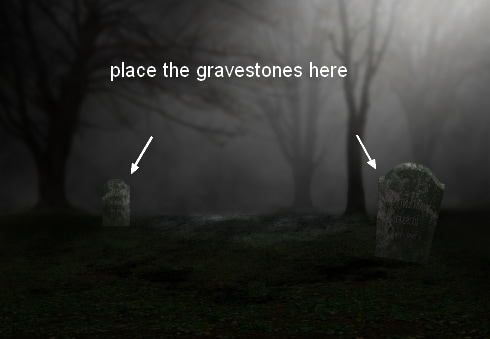
Open the gravestones image. I took two gravestones and place them in the ground as shown below:
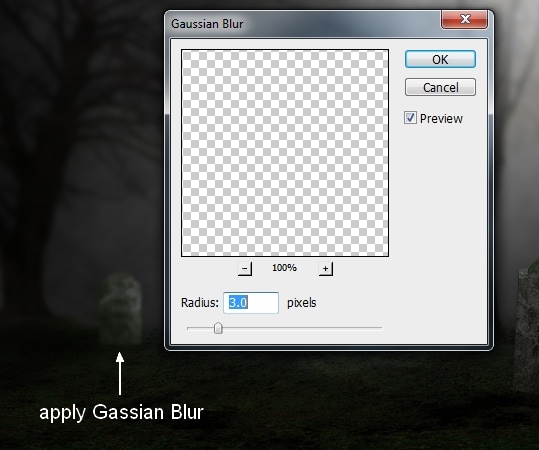
Apply Gassian Blur with 3 px to the smaller one:
Step 4
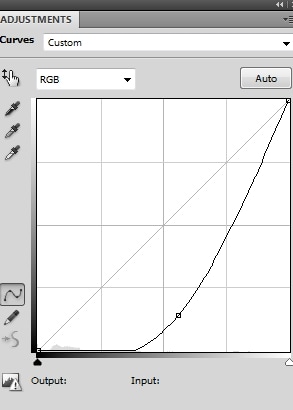
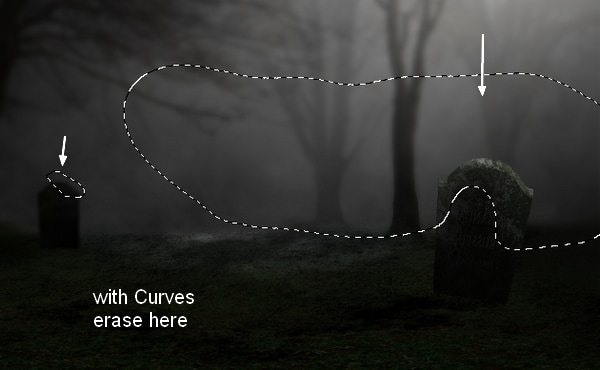
Make all the gravestones layers selected and press Ctrl+G to create a group for them. Change the mode of this group from Pass Through (default group mode) to Normal 100%. Make a Curves adjustment layer within this group to brighten the gravestones:
On this layer mask use a soft black brush to erase the top right of the gravestones as it’s illuminated by the light:
Step 5
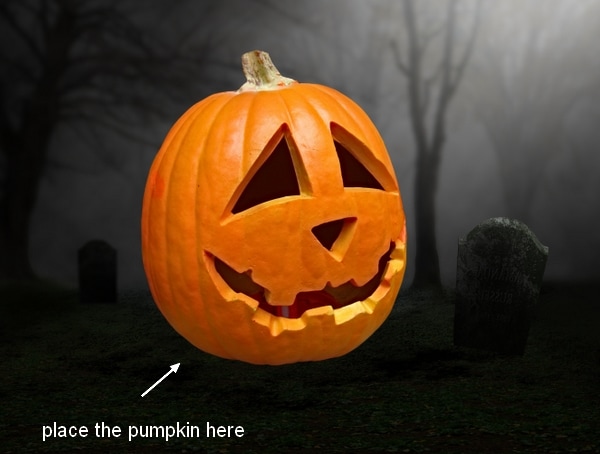
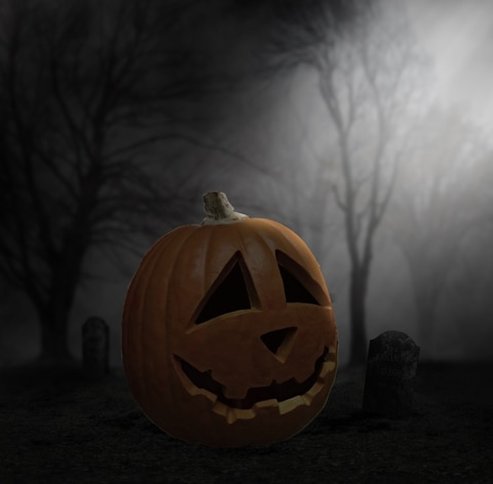
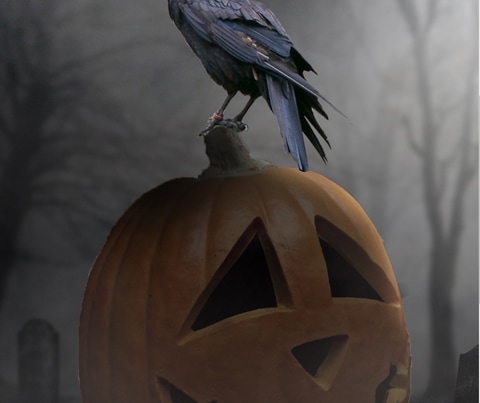
Cut out the pumpkin and place it in the middle section of the ground:
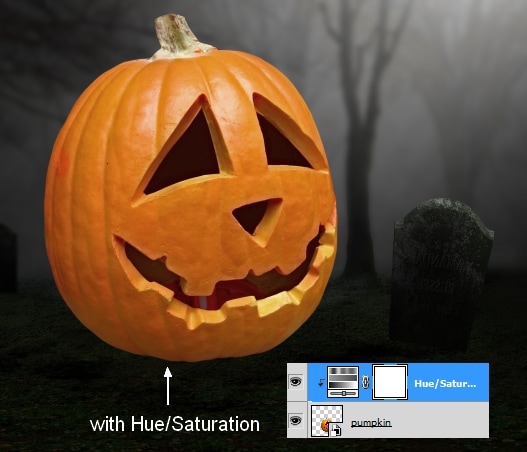
Step 6
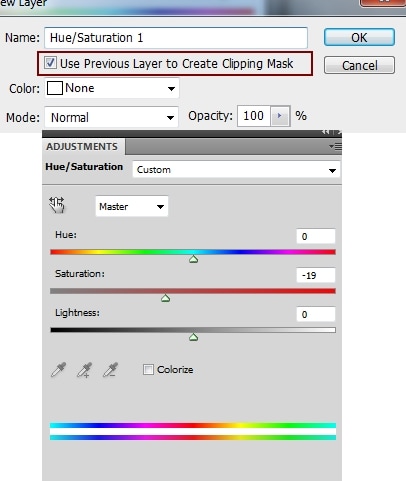
First Item you need to create is a new layer found in your layer palette drop down menu. Make sure you seIect "Use Previous Layer to Create Clipping Mask". Second create a Hue/Saturation adjustment layer with Clipping Mask around the pumpkin to reduce the saturation of the pumpkin a little:
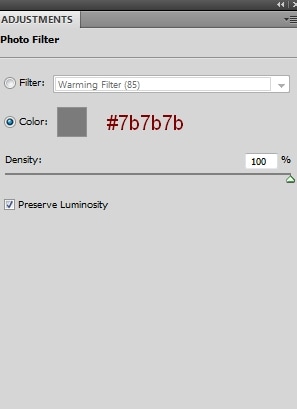
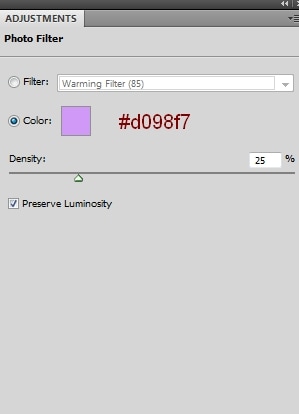
Step 7
I used a Photo Filter adjustment layer with the same purpose:
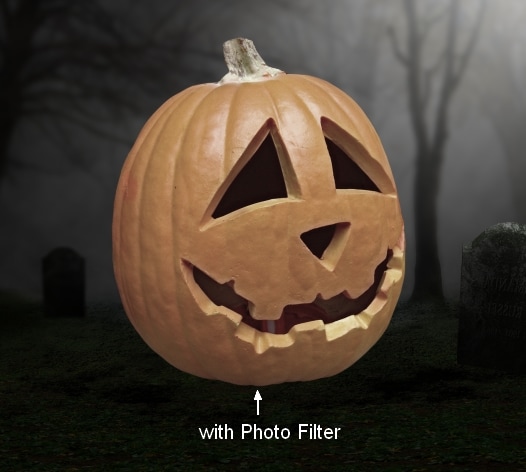
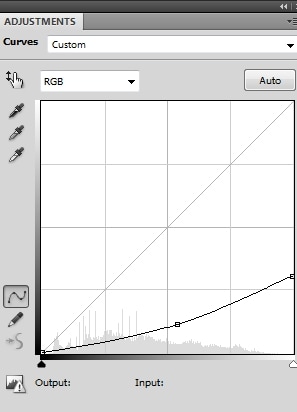
Step 8
I used Curves to darken the pumpkin: To do this, activate the pumpkin selection by pressing CTRL and clicking on the pumpkin preview window. Once selected create a curves adjustment layer to mirror the image below.
On this layer mask us a soft black brush to erase the top right to make some light there:

Step 9
While holding down the ctrl key click on the pumpkin layer preview window - a selection should now appear around the pumpkin. Next go to select > inverse to select just the background and not your pumpkin. Now click back on the curves layer and make sure you have the mask selected. From there select your brush tool with a hard brush and colour black. Paint around the canvas to get rid of the darkness on the background. Once done it should look like this...
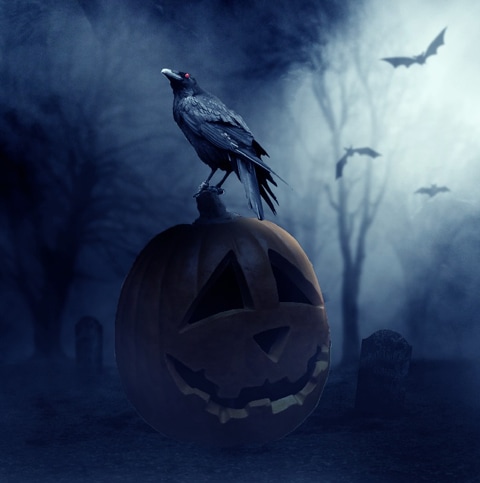
Step 10
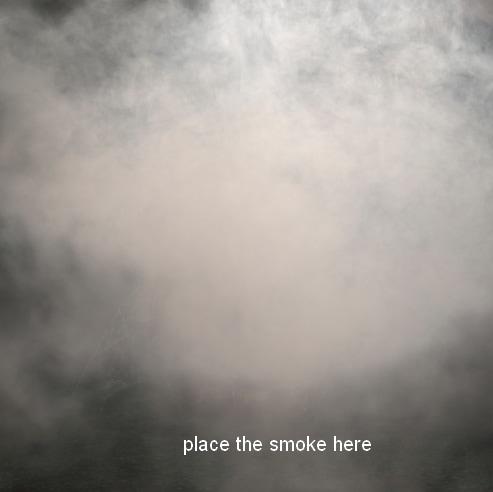
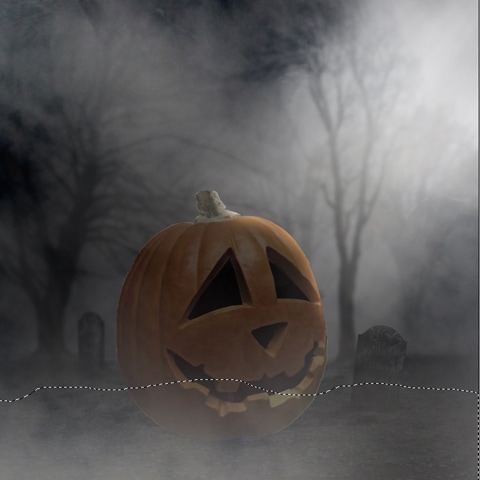
Open the smoke image (feel free to use your own photo). Isolate it from the background and put it over the working document:
Add a mask to this layer and use a soft black brush opacity 25% to reduce the smoke intensity. I also reduced the opacity on the smoke layer to 60% and added a"hard light" layer blending mode to get the results below:

Step 10
On this layer mask use a soft black brush with the opacity about 20% to erase the foreground to make the effect we will be creating more visible:
Step 11
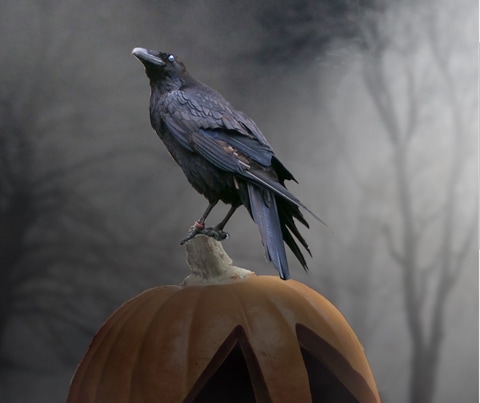
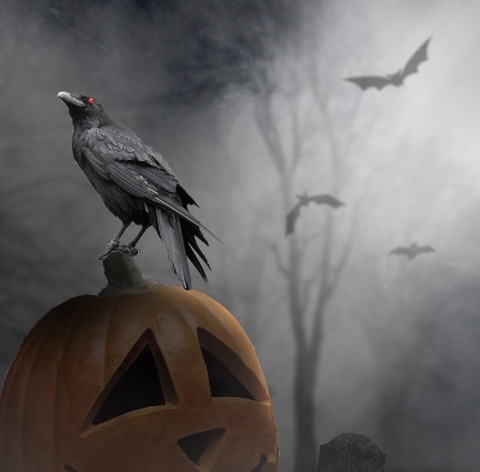
Open and Isolate the crow and place him above the pumpkin:
Step 12
Now its time to paint in the shadow of the crow. To do this make a new layer, bring up the selection of your pumpkin to isolate the area for your shadow then use a black soft brush with an opacity of 20%. Adjust your size accordingly depending on the areas that you are painting in.
Step 13
It's time to Adjust the Hue/Saturation of the crow so that it blends in more to the background. First thing to do would be to hold the cntl key and click on the crow preview window on that layer to create a selection of the crow. Next; make a Hue/Saturation adjustment layer with the following values:
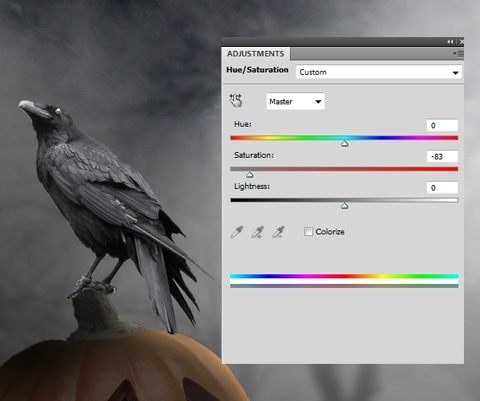
Step 14
Create a new layer and use a hard brush with the size about 8-9 px and with a red color ( I used #ff0000) to paint an evil eye for the crow:
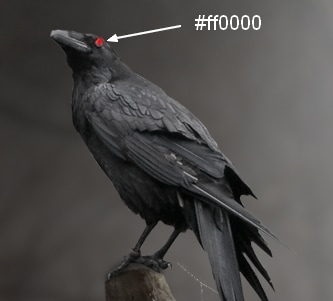
Step 15
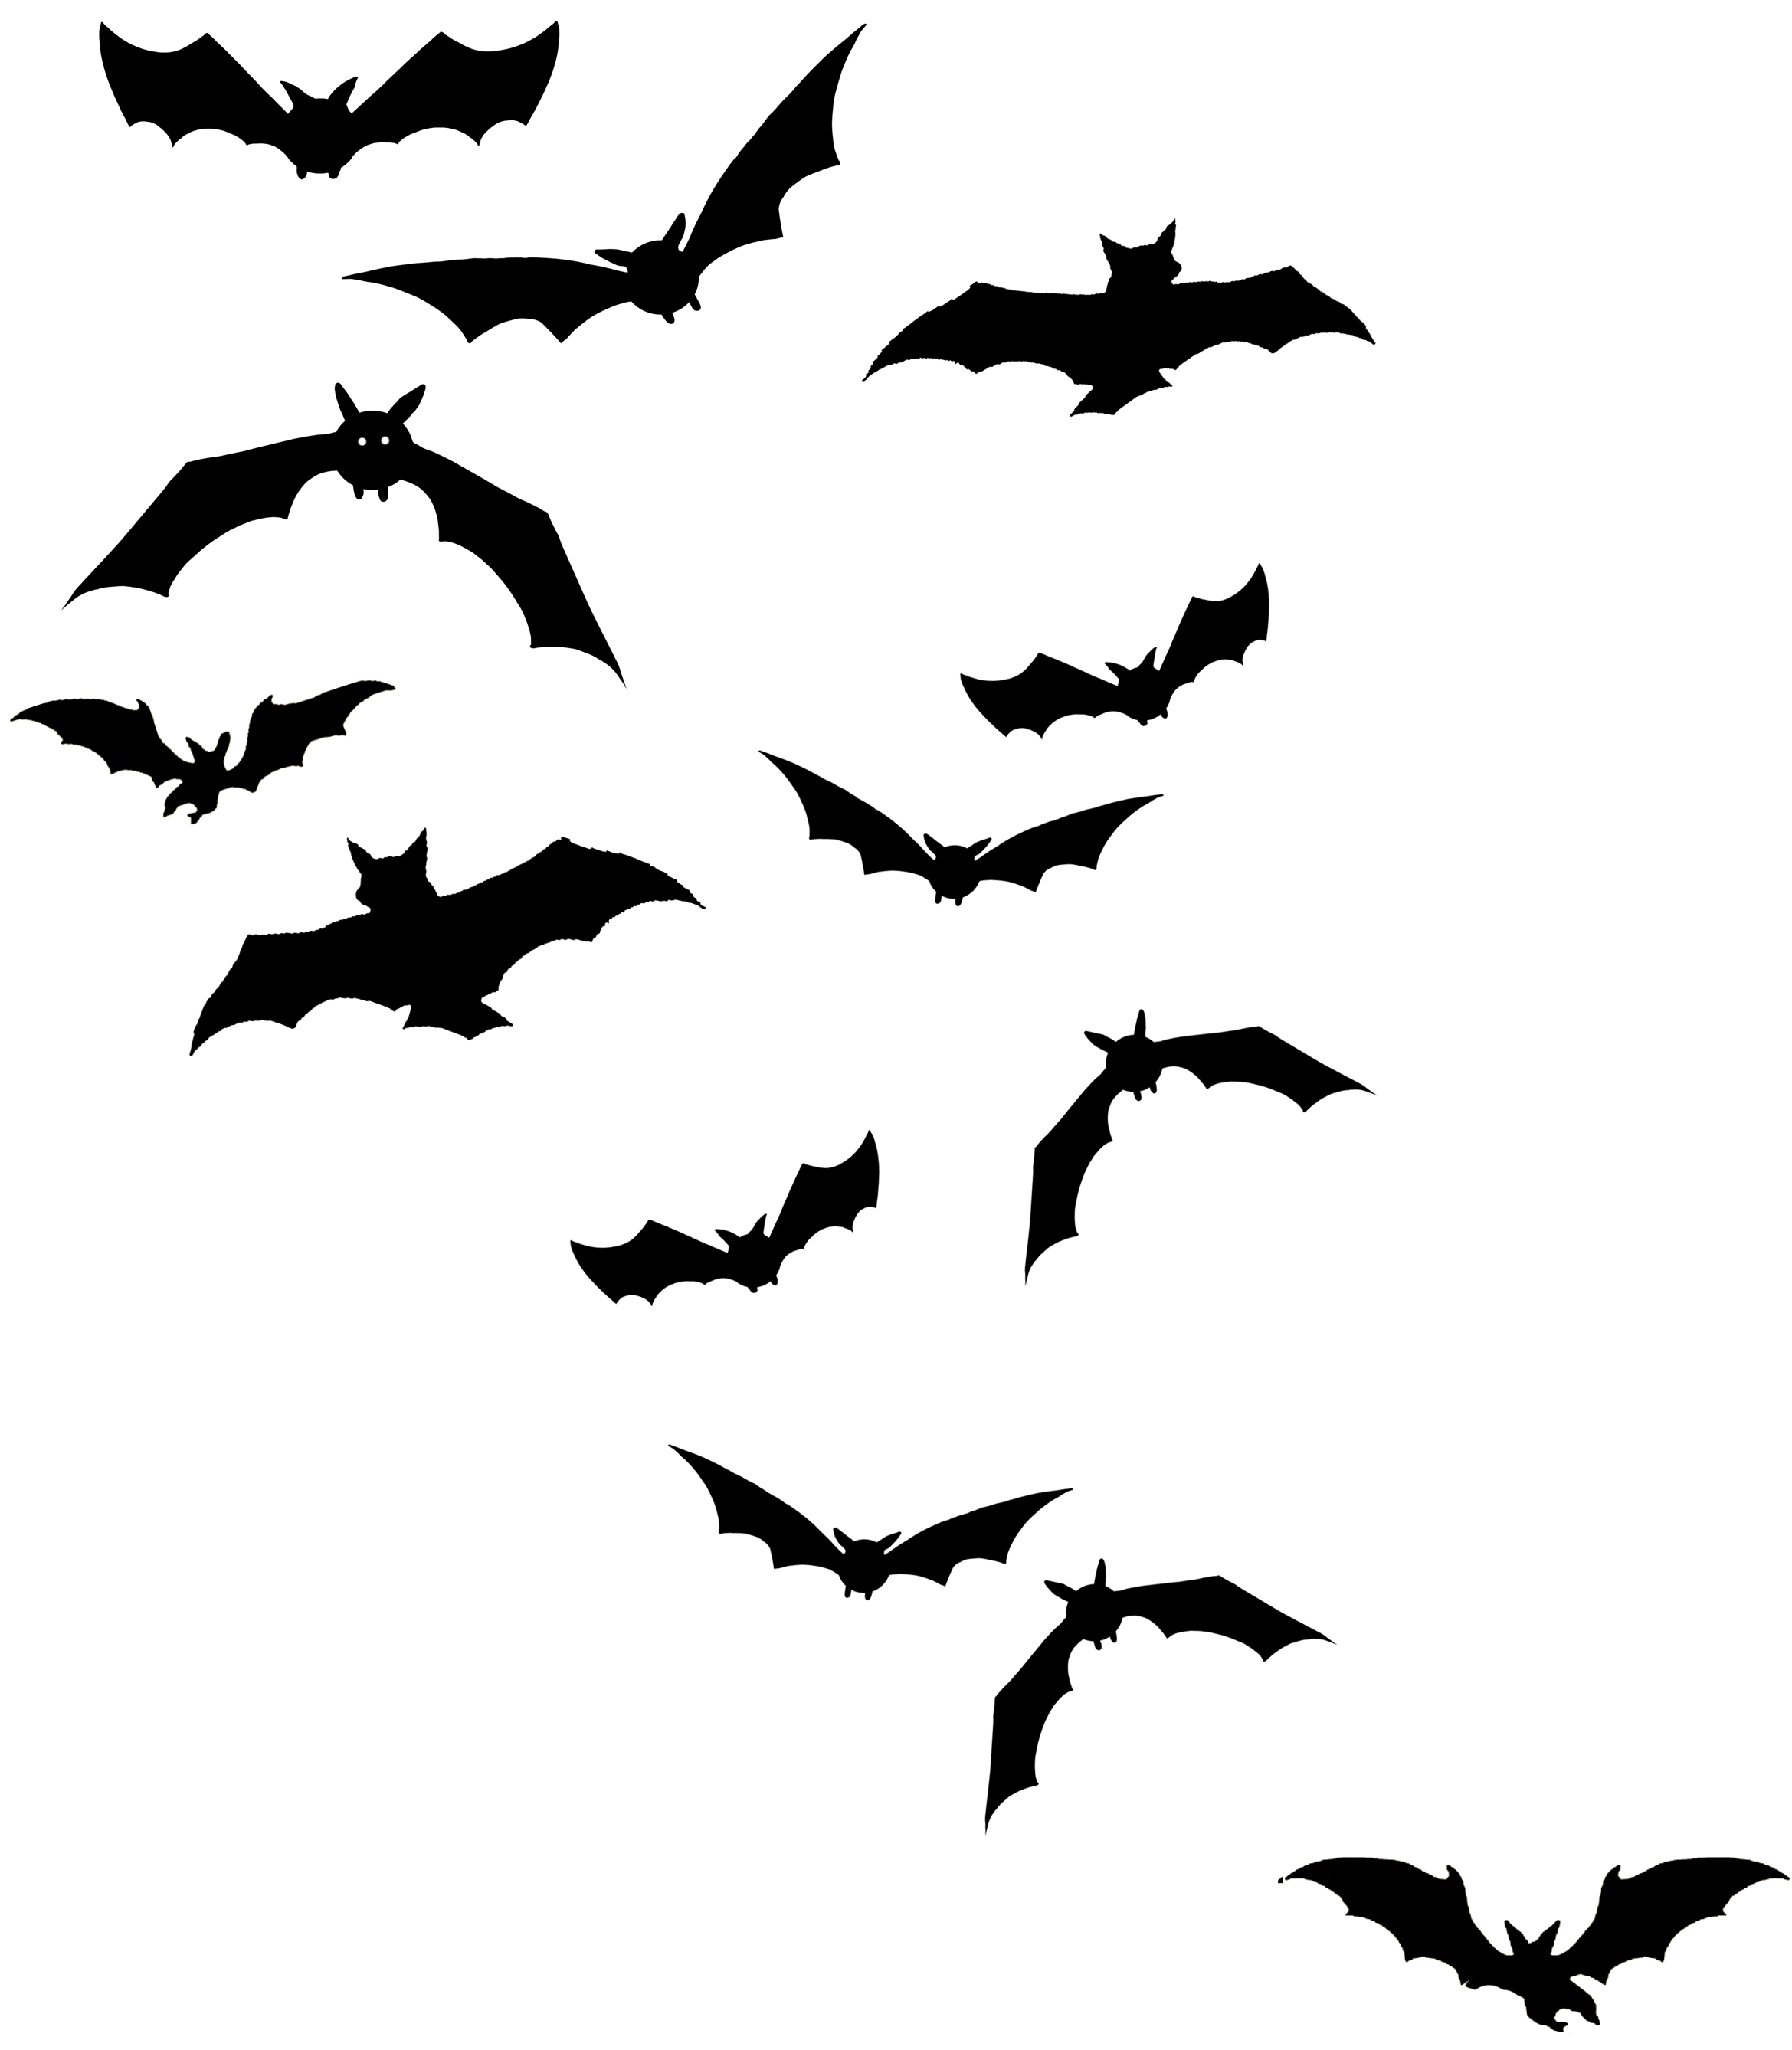
Its time to open the bat image and clip out 3 different bats and put them on 3 different layers - place/size them accordingly. I lowered the opacity of these bats to 30 - 50% to fit the foggy background:
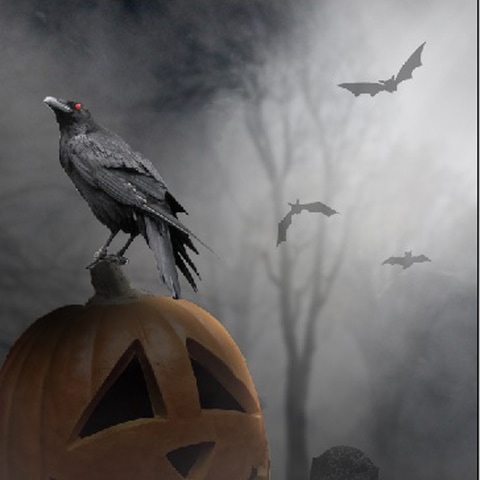
Apply Gassian Blur with 3 px to these bat layers:
Step 16
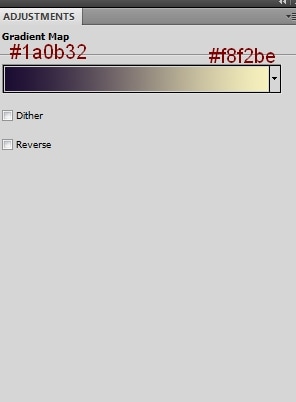
It’s time for coloring the scene. Make your foregound colour: #1a0b32 and background colour #f8f2be. Then make a Gradient Map adjustment layer on the top:
Change this layer mode to Soft Light 100%:
Step 17
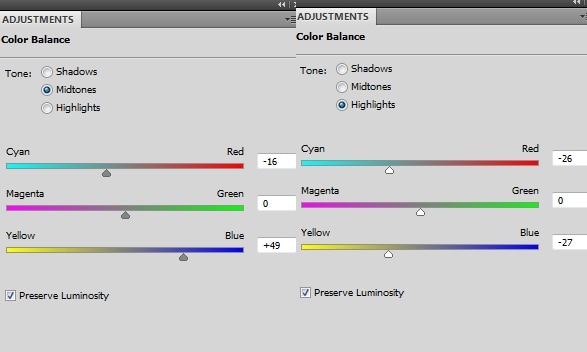
I used Color Balance to add some cyan-blue to the scene (2 diff adjustment layers):

Step 18
Create a Photo Filter adjustment layer on the top:
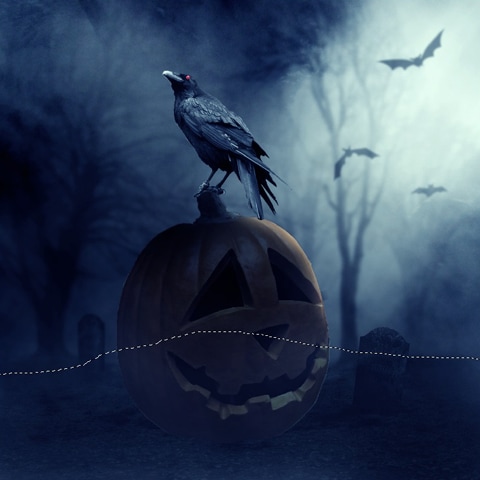
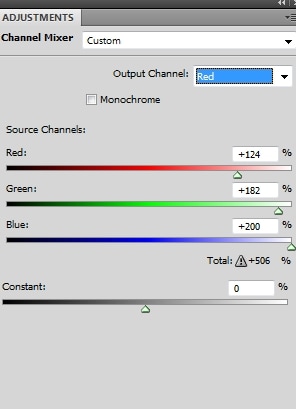
Step 19
On the top of the layer, use the Lasso Tool (L) to make a selection on the ground and set the feather radius for it to 60:
Go to Layer > Adjustment Layer > Channel Mixer:
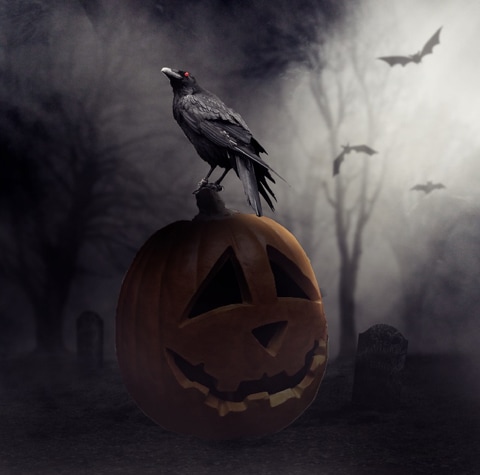
We have the result below:

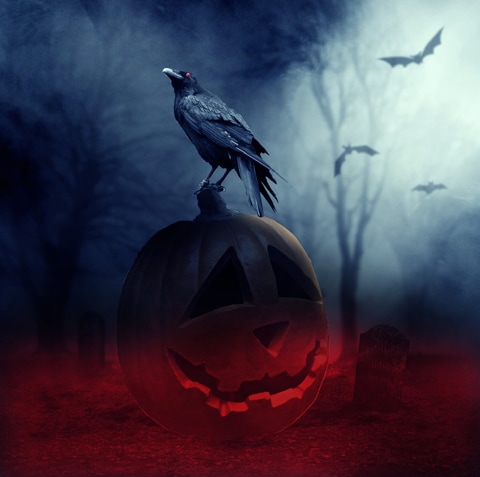
And here is the final outcome!