Devil's Eye Tutorial
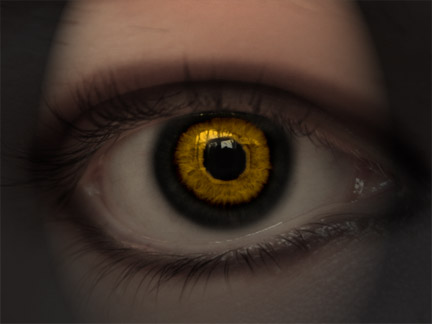
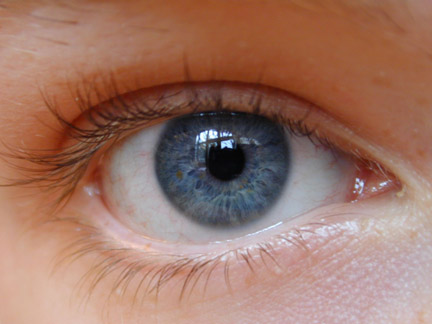
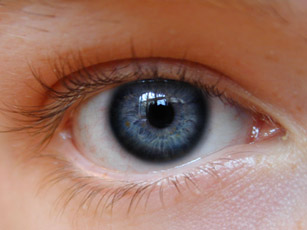
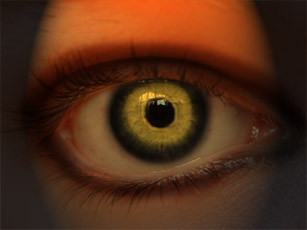
Here's a quick tutorial for a creepy eye effect that has great results. You will go from this...

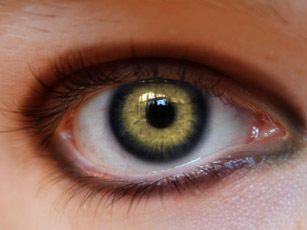
To this!
Step 1
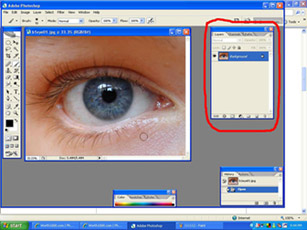
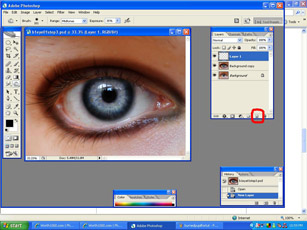
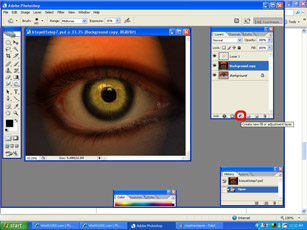
Open your chosen eye in PhotoShop.
First duplicate the eye layer(and work on the duplicated one so you can toggle back and forth later, and see the changes),to do this go to your layer/channels/paths window, right click the word background and chose "duplicate layer". I marked the window with red.
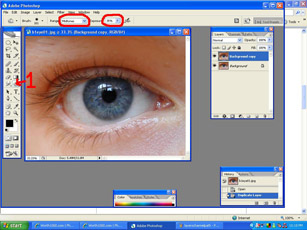
Then select the burn tool and set it's range to midtones and exposer to 35% (the burn tool is labeled 1 and its options are circled),
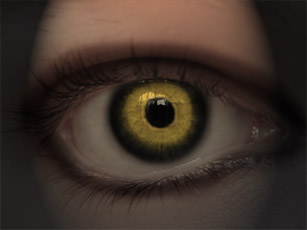
...then burn all around the edges of the iris (the start of the eye, the coloured part not the white part) till it's almost black but not quite black,then increase the size of the brush and burn the pupil (the black part of the eye) - it should resemble this now.
Then use the burn tool around the whole eye (right on the eyelash line) and apply it like eyeshadow till it starts to look heavy and dark,
like this,
Then use the burn tool around the whole eye (right on the eyelash line) and apply it like eyeshadow till it starts to look heavy and dark,
like this,
Then grab the dodge tool set its range to midtones and its exposer to 35% (this is the same place the burn tool is located, hold down the burn tool icon and the secondary menu will appear - click on the dodge tool. Go inside/in between of the iris and pupil and make it lighter.

Now create a new layer (to do this go to your "layers/channels/paths" window and click on the icon I circled.
Set the blending mode to colour (to do this you make sure that the new layer is active or highlighted blue, and at the top of the layers channel you'll see a box with an arrow pointing down and inside the box it will read "normal" click on it and a list of options will come up, change "normal" to "colour"(is it all the way towards the bottom) click it, and reduce the opacity(it is located at the right of the box you just changed) of that layer to 50%, now get a nice bright colour (on your tools just double click on the top colour box).
Now click the paintbrush tool make the mode of brush to normal soft brush (0%) and set the opacity of it (the brush) to 100 and the flow to 100 and choose a brush size so that it fits in between the iris and the pupil and paint inside of it (I chose an orange/yellowish colour).
Now click the paintbrush tool make the mode of brush to normal soft brush (0%) and set the opacity of it (the brush) to 100 and the flow to 100 and choose a brush size so that it fits in between the iris and the pupil and paint inside of it (I chose an orange/yellowish colour).
Now click on to your "background copy" layer again and select your dodge tool again and go right around the edge of the pupil (with a very small brush with med softness) a few times. To get this,

Then increase the brush size and go all around and in between the iris and pupil where you coloured.
With the "background copy" layer still active, go to "filter-render-lighting effects" and click it, you'll see a diagram of your eye, now make the light come from the top of your eye (this is the only way I can explain it, you'll see an oval with four little squares and it will have a mouth like pacman), the mouth of pacman is the focal point of light, put the mouth/slit above the top of the eye or any direction you think it looks best, now for the rest of the diagram, you'll see two boxes to the right, pick the top one and change the colour to a dark/pale looking colour(I chose a dull orange) and hit ok. This is the reaction...
Now your eye should look pretty creepy about now, but if it looks to colorful you can try this: with your background copy layer still active go to "create new fill or adjustment layer" I circled it here:
(that is located right under your background and layers pallet - it's a circle that is halved and is black on one side and white on the other), click it and go to hue/saturation and click that, now go to the saturate and decrease it till you have a more likable product and hit
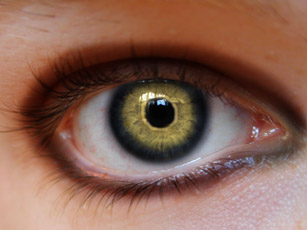
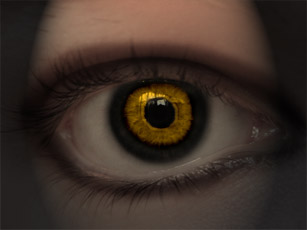
ok. You should have something like this now.
ok. You should have something like this now.
Go to your colour layer and make it active (highlighted blue), with it active hover your hand/arrow over the square (the little picture of your colour layer) and hold the control button down and click it (you'll see in the main picture (the big one) that the colour you have painted in is now selected with the little moving ants, now as before click on "create new fill or adjustment layer" then click on brightness/contrast and increase the contrast and decrease the brightness till you get something you like and - click ok.
If you don't like the colour you can change it, just hover your hand/arrow over the colour layer you made and control click it again (you will see the ants dancing again on the main picture), and go to the "create fill or adjustment layer" then go to hue/saturation and use your hue slider bar till you get your preferred color and click ok. And there you have it a devil's eye!