Glass Ball Tutorial
|
During this Photoshop tutorial we'll be going through 9 major steps to create a glass ball. The main goal of this tutorial is that you get an idea how to approach this. It's not that important to remember all settings, but it's more important that you understand what's happening and to learn a little about clipping layers and more filters like spherize.
The tutorial is divided into 5 main areas:
|
Some important things you need to know about this tutorial:
- It's important that you read very carefully and copy everything what is shown in the screenshots
- Doing this tutorial too fast will most likely result in failure so take your time.
Step 1: Prepare the Document
Save the following file called Newspaper on your computer (right click on the link and select in Windows Save Image As...).
For this tutorial I've chosen to go for a rather small file so create a new canvas and choose the dimensions 640x480 and we’ll be using pixels as our units. Your background can be transparent and resolution set to 300 pixels per inch
Open the Newspaper image you saved earlier into Photoshop. Add a new layer by clicking on the Create a new layer icon . Name this ‘Glass Ball’
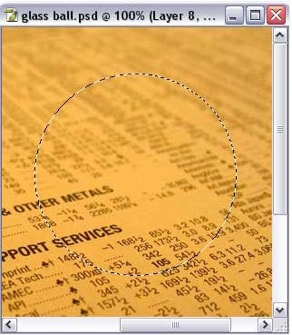
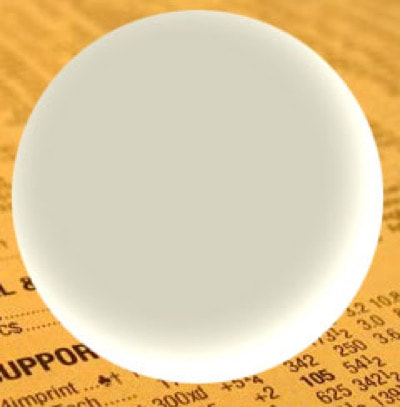
Grab the Elliptical Marquee tool from your toolbar and make a selection (remember to hold down the shift key before you make the selection to make the selection a perfect circle) somewhere in the area and with the size that I'm showing here:
Step 2: Fill the Selection with the base colour of the Glass Ball
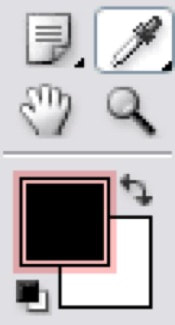
Click on the foreground colour in the tool bar marked with red in this screenshot:
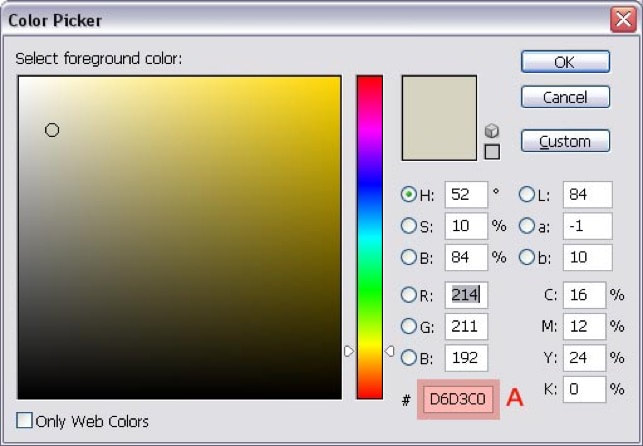
In the Color Picker window that opens you enter the value D6D3C0 in the area marked with A:
Grab the Paint Bucket Tool and fill the selection with this color.
Press Ctrl +D to get rid of the selection.
Press Ctrl +D to get rid of the selection.
Step 3: Add a Layer Style
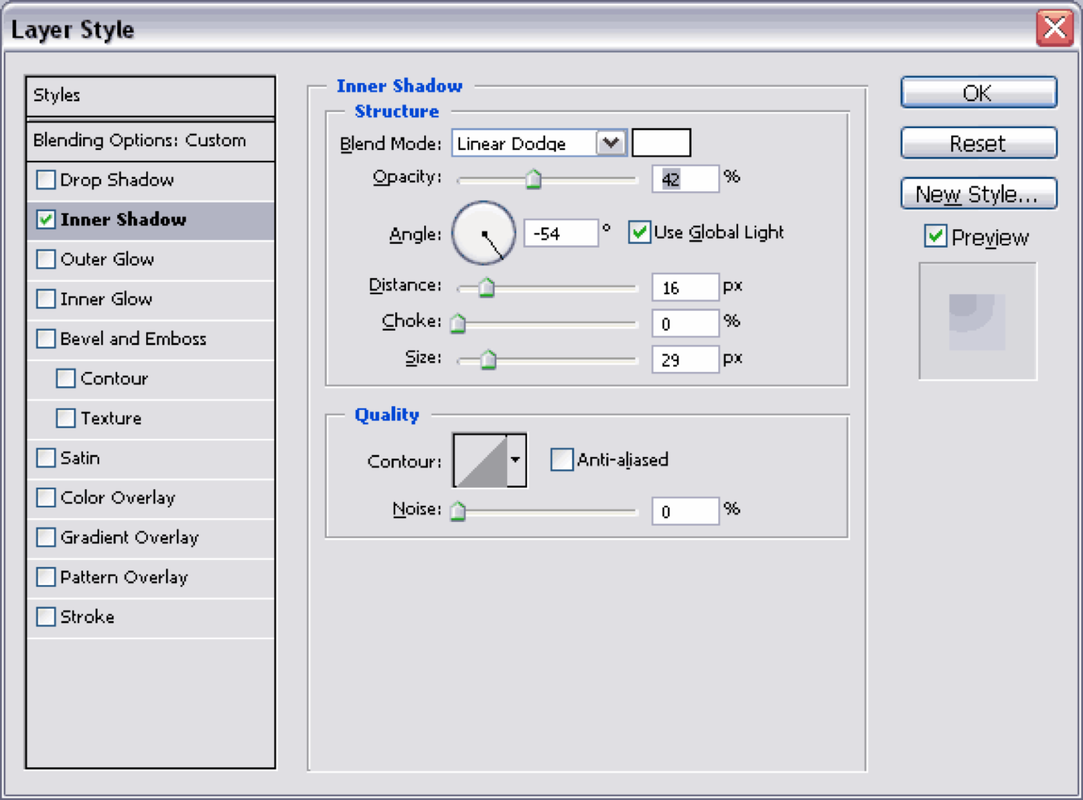
Go to the layers palette and either double click the Glass Ball layer or click on the Add a Layer Style icon and select Inner Shadow and use the settings shown here (watch out: the colour white is selected):
The result should look like this:
Step 4: Add a Gradient
Add a new layer by clicking on the Create a new layer icon . Name this ‘Gradient’.
Clip this layer with the layer underneath by pressing Ctrl + Alt + G. This will create a clipping layer which only affects layers it is above (an arrow identifying that is now working on the layer underneath will appear in the layers palette).
Clip this layer with the layer underneath by pressing Ctrl + Alt + G. This will create a clipping layer which only affects layers it is above (an arrow identifying that is now working on the layer underneath will appear in the layers palette).
Change the background color in the tool bar and use the following color: 65645F. We're now going to draw a gradient using the current foreground and background colors. Select the Gradient Tool in the toolbar (if it's not visible, then look under the Paint Bucket tool ).
Take a short look at the next screenshot. Make sure that a linear gradient (B) is selected in the options bar at the top and that the option Reverse (C) is selected. (mode should be normal, opacity 100%).
Take a short look at the next screenshot. Make sure that a linear gradient (B) is selected in the options bar at the top and that the option Reverse (C) is selected. (mode should be normal, opacity 100%).
If you don't see a gradient that uses your colours at A which should look like this:
Then double click on the gradient in the options bar (A) and select the gradient from the list (most likely the first one) and click OK.
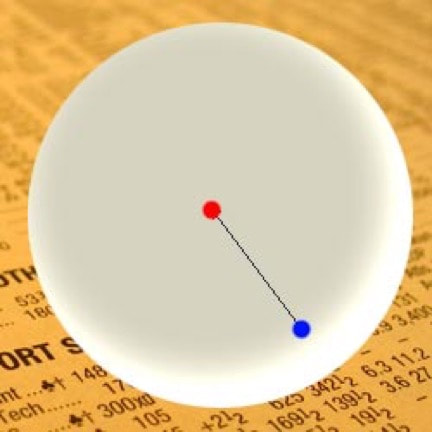
Start in the middle where you see the red dot and end where you see the blue dot (Just before the area where the main color is getting lighter).
Start in the middle where you see the red dot and end where you see the blue dot (Just before the area where the main color is getting lighter).
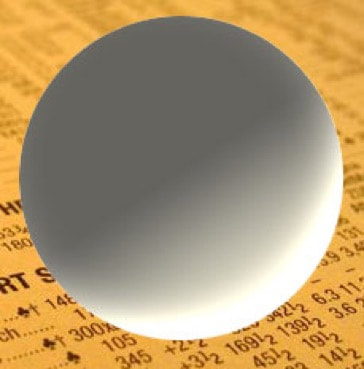
The result should look like this:
Press the letter D on your keyboard, which makes the foreground colour black, the background colour white.
Add a Layer Mask to this layer by clicking on the Add Layer Mask icon. Note: If the foreground colour is white and background colour is black after you added the mask, then everything is okay. If they are switched, then just click on the double arrow points icon to correct this.
The Gradient Tool is still active, but this time we need a Radial Gradient. Select the Radial (Circle) Gradient in the options bar (the one beside the linear gradient (marked B in our previous screenshot of the options bar))
With the layer mask still active (It will have a double border), create a radial gradient by starting in the middle and stopping at the outer edge of our circular shape.
By this time we should you have something like this:
Step 5: Add More Layer Styles
We're now going to duplicate our Glass Ball layer. To do this right click on the Glass Ball layer and select - duplicate.
The next step is to move the original layer (that is labelled with the name Glass Ball) to the top of our layers palette; click on Glass Ball layer and drag (B) it all the way up until you notice a dark black line appearing above the top layer. At that moment release the mouse button.
The next step is to move the original layer (that is labelled with the name Glass Ball) to the top of our layers palette; click on Glass Ball layer and drag (B) it all the way up until you notice a dark black line appearing above the top layer. At that moment release the mouse button.
Note: it turns out that your clipping layer may become inactive once the step above is completed – that’s okay we can fix it! To correct that make sure Gradient is active and press Ctrl + Alt + G. Again, this should reestablish a clipping layer.
Make sure that Glass Ball (our new top layer) is active (it will be highlighted in blue).
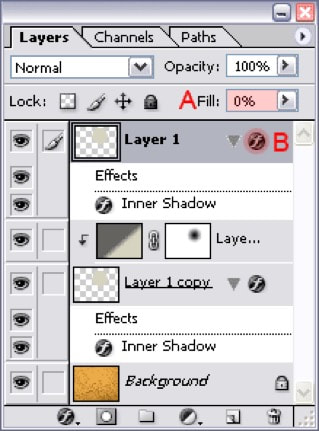
Set the Fill of this layer to 0% (A) and then click on the Layer Style icon (B) to modify the Layer Style of this layer:
Make sure that Glass Ball (our new top layer) is active (it will be highlighted in blue).
Set the Fill of this layer to 0% (A) and then click on the Layer Style icon (B) to modify the Layer Style of this layer:
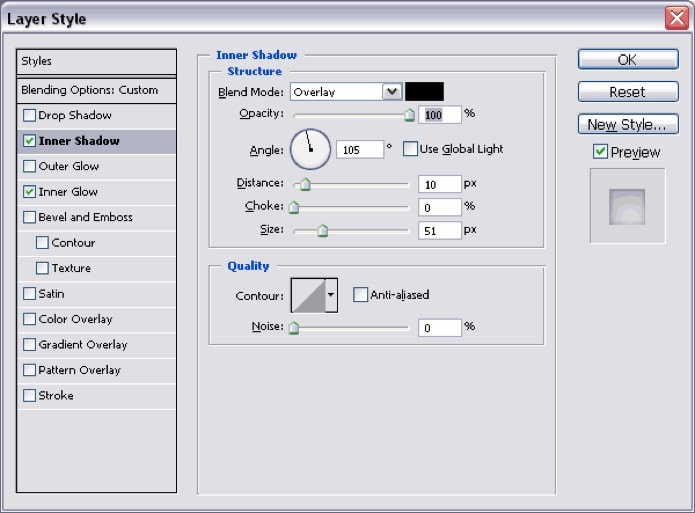
Use the following effects settings for the layer style. Make sure that all settings are exactly the same, including color or blending mode settings.
Inner Shadow
(pay special attention to the option Use Global Light, because it's not selected! Also notice that we have a black rectangle beside the Blend Mode; double click it if yours is not black, it will need to be!)
Inner Shadow
(pay special attention to the option Use Global Light, because it's not selected! Also notice that we have a black rectangle beside the Blend Mode; double click it if yours is not black, it will need to be!)
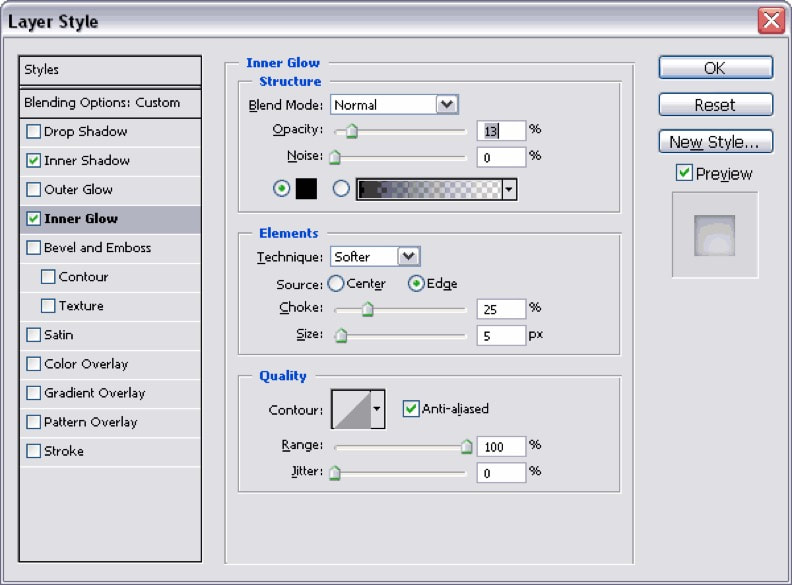
Inner Glow layer style...
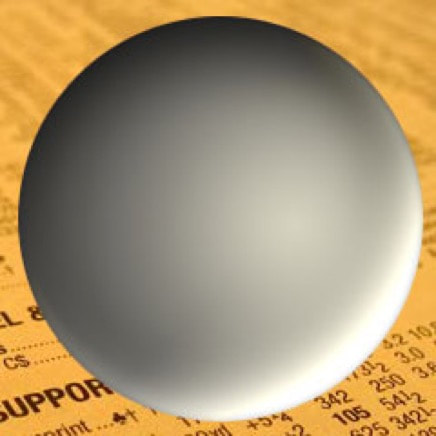
After this our image should look something like this:
Step 6: Add More Volume!
Add a new layer by clicking on the Create a new layer icon . Call this ‘Center Highlight’
Select the Brush Tool in the tool bar.
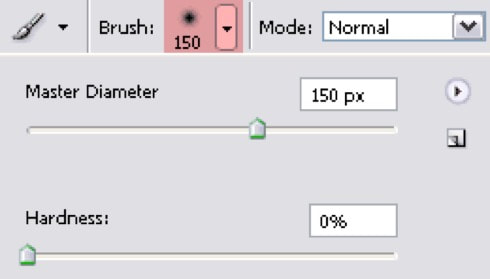
Click on the area of the options bar that I've marked in red and select a 150px brush, with a hardness of 0%, which is the softest brush you can use.
Select the Brush Tool in the tool bar.
Click on the area of the options bar that I've marked in red and select a 150px brush, with a hardness of 0%, which is the softest brush you can use.
Set the foreground colour to white.
Click once with this brush exactly in the middle of this new layer (Center Highlight). Now go to the menu and select Filter/Effects/Gaussian Blur... and select a radius of 25 and click OK.
With the top layer (Centre Highlight) still active we Ctrl + click on the thumbnail of the layer underneath this layer (Glass Ball) which will load it's shape (the ball) as a selection and all we have to do now is to click on the Add Layer Mask icon and we've got rid of all white pixels outside our glass ball.
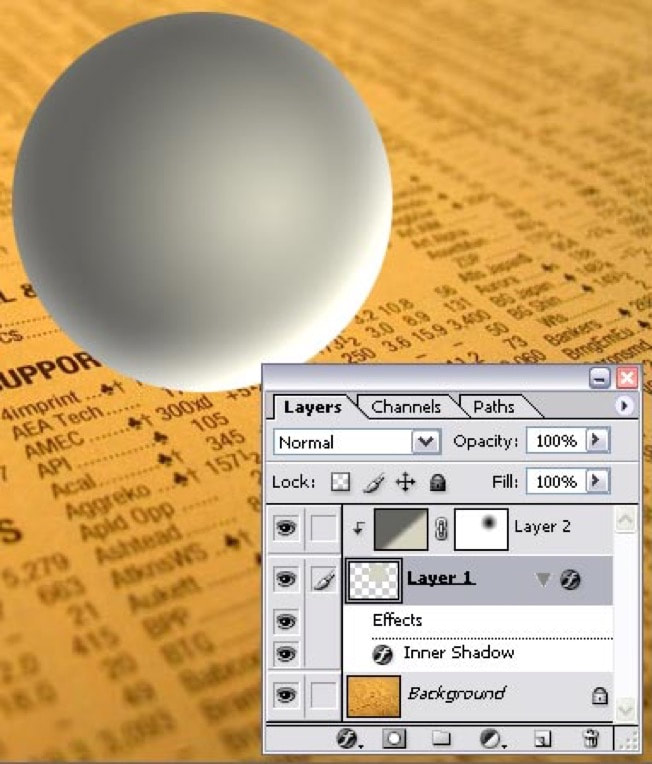
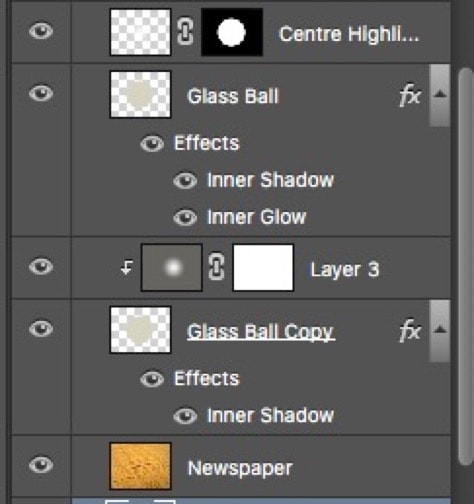
Now change the opacity of this layer to 30%. This screenshot also shows how your layer palette should look like at this moment:
Step 7: Create a Highlight
Add a new layer in Photoshop by clicking on the Create a new layer icon and that's going to be called ‘Spot’.
Select the Brush Tool and use a hard brush (hardness is 100%) with a size of 20. Change the foreground colour to white (or a very slight yellow (close to indoor light) using a value of FFFFE8).
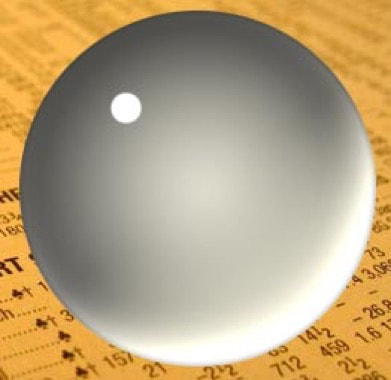
Place the highlight in the location shown here:
Select the Brush Tool and use a hard brush (hardness is 100%) with a size of 20. Change the foreground colour to white (or a very slight yellow (close to indoor light) using a value of FFFFE8).
Place the highlight in the location shown here:
Go to the menu and select Effects/Blur/Gaussian Blur... and select a small radius of .5 and click OK.
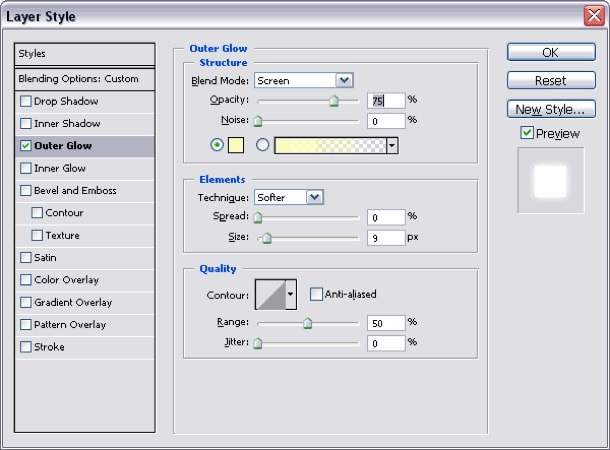
Go to the layers palette and click on the Add a Layer Style icon to add a layer style and select the Outer Glow effect and use the settings shown here:
Go to the layers palette and click on the Add a Layer Style icon to add a layer style and select the Outer Glow effect and use the settings shown here:
Step 8: Add a Shadow
First make the Glass Ball copy (the one above the background layer) the active layer by clicking on it; a will appear in front of it.
Now set the Fill of this layer to 25%
Now set the Fill of this layer to 25%
You'll notice that by doing that, that we're are getting closer to the final result!!!
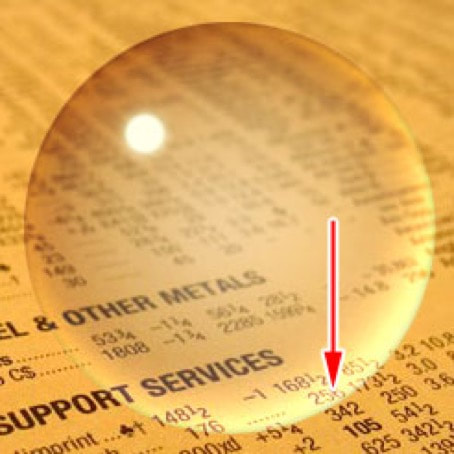
If the bottom is too bright (marked with the arrow), then just select the Layer Style of Glass Ball copy and lower the opacity of the Inner Shadow effect (or increase it if that's what you prefer).
We now click on the Newspaper layer to make it active.
Add a new layer by clicking on the Create a new layer icon .
With this layer (Call it ‘Shadow’) active we click on Ctrl + click on the thumbnail of the layer above (the one called ‘Glass Ball Copy’). The result is a selection in the Shadow layer that is based on this glass ball.
Press the letter D on your keyboard, which makes the foreground color black, the background color white
We're now going to draw a gradient using the current foreground colour (black) in combination with transparency. Select the Gradient Tool in the toolbar (if in it's not visible, then look under the Paint Bucket tool ).
Make sure that a Radial Gradient (B) is selected in the options bar at the top and that the option Reverse(C) is selected.
If you don't see a gradient in your options bar (A), that looks like one going from transparency to black, then double click on the gradient in the options bar (A) and select the gradient from the list (the one right beside D) and click OK.
Draw the gradient by starting in the middle of your selection and end at the edge of this same selection.
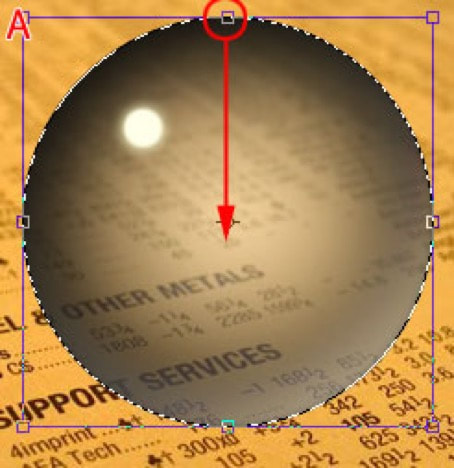
We're now going to transform this selection in an elliptical shape by using the transform tool. Go in the menu to Edit/Free transform or press Ctrl + T . A rectangular box with 8 handles will appear.
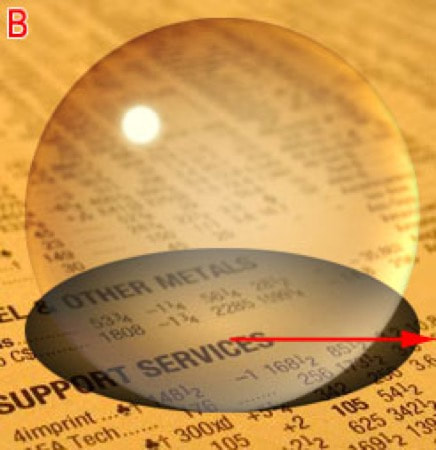
Now pull the upper center handle downward (see A) until you have a shape that looks like the one in B.
Now press enter on your keyboard to complete the transformation and press Ctrl +D to get rid of the selection. You can also use the menu to remove the selection: Select/Deselect.
We now have to move this shadow to the right (B). Be aware that the arrow only marks the direction, not the distance.
Select the Move Tool in your tool bar.
To move the selection, click on the shape and while holding the mouse button move the shape in place. Have a look at screenshot C to see where you should place this shadow. If your shadow seems to jump while you try to move it, then go to the menu and select view and make sure that Snap is turned off
Now change the opacity of this layer to 50%.
In the menu we select Filter/Blur/Gaussian Blur... and select a radius of 2 and click OK.
Step 9: Deform the Inside of the Glass Ball and Shadow
In this last step we're going to deform the image inside the glass ball. Make sure that our ‘Shadow’ layer is still active and Ctrl + click on the thumbnail of the layer above (the one called ‘Glass Ball Copy’). The result is a selection on the ‘Shadow’ layer that is based on this glass ball (like we did in step 8).
Now go to the menu and select Filter/Distort/Spherize...
Select for Amount the value 100% and make sure that Normal is selected for Mode. Click OK.
The shadow is now deformed.
Now go to the menu and select Filter/Distort/Spherize...
Select for Amount the value 100% and make sure that Normal is selected for Mode. Click OK.
The shadow is now deformed.
Make the background layer active and press Ctrl + F.
Note: Ctrl + F will always apply the filter that was used previously, in our case Spherize.
We can also repeat the steps by making sure the Newspaper layer is active and then going to the menu and select Filter/Distort/Spherize again.
That was our final step and this is the result:
Note: Ctrl + F will always apply the filter that was used previously, in our case Spherize.
We can also repeat the steps by making sure the Newspaper layer is active and then going to the menu and select Filter/Distort/Spherize again.
That was our final step and this is the result:
Pretty Cool Right??
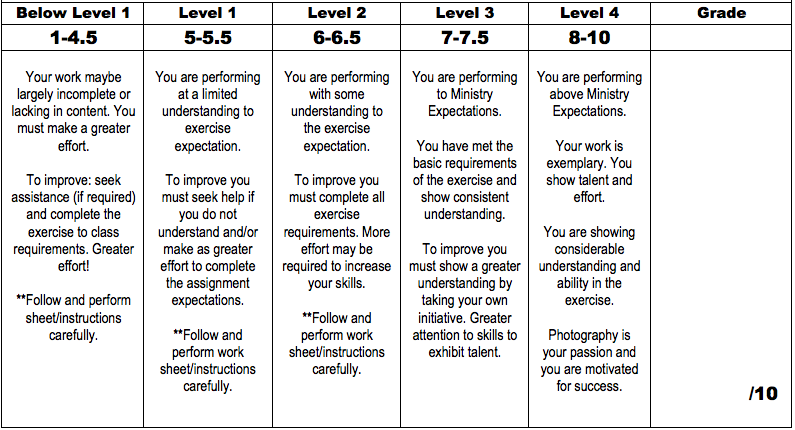
Your Task:
Using the steps outlined in this tutorial – you will be going out and shooting some photos in which you think will require you to be interacting with a Glass Ball, you can shoot many but you will only need to edit ONE for your submission. You can be holding it in your palm, about to throw it, having it magnify or distort the background image in which it’s placed, etc.
You will be working in pairs for this assignment but each student will have to produce their own original work. You will be working off of your Z: drive so create a new folder entitled “Glass Ball” to keep all of your work in.
Be creative and take your time! Also, pay attention to the light sources in the area in which you are shooting as they will depict where your shadows and highlights will be placed on the ball.
Once you are done, you can export the .psd into a .jpg, bring the image into Microsoft Word, add your name and print it off for submission. Make sure to save the .psd frequently as we may want a copy of your work!
Here is an example of one that I made – you can see that I experimented creating some lightning within the ball and added elements like colour overlays and glowing effects for the hands.


