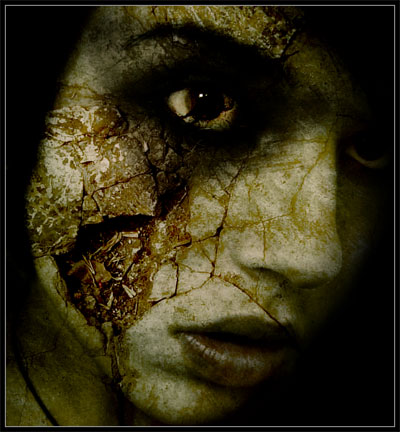
Decay Tutorial
|
This tutorial will show you how to use textures to dramatically change the look of pictures in a few easy steps. This is only a variant of how you can achieve that, the key is (like everyone says) to keep experimenting. Textures are very important is photographic manipulations, and used properly can create great effects.
|
Step 1 – Choosing the images
The first step is choosing the image you will be using. Pick a crisp, well shot image (quality of the original picture is very important). Different textures create different effect, usually wood or stone textures create the best effects.
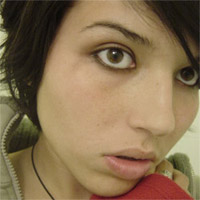
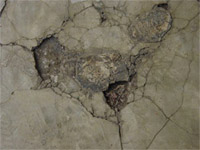
For this tutorial I chose this free image (fig.1) from www.deviantArt.com I will also be using a texture (fig.2) to transform this image.
Download Model image:
For this tutorial I chose this free image (fig.1) from www.deviantArt.com I will also be using a texture (fig.2) to transform this image.
Download Model image:
| model_source.jpg |
Step 2 – Preparing the scene
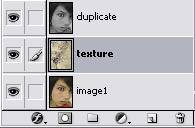
Open the image, right click on the layer in the layers tab and click “duplicate layer”. Click on the newly duplicated layer and desaturate it (CTRL+SHIFT+U). Now set this layer to “soft light”. This will give the image more consistency. Now paste the texture and put it between the original image and the duplicated layer (fig. 3).
Step 3 – Texturing
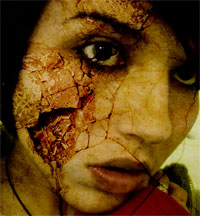
Click on the texture layer and set it to “color burn”. This blending mode may work on another image so it’s best to play around with this. The best blending modes are “multiply”, “color burn”, “overlay” and “soft light”. Choose the one that suits the image best. Now the image should look something like fig. 4. Starting to look good now. We’re almost done now…
Step 4 – The Finishing Touches
Now for the finishing touches…
First thing that bothers me is that the texture is all over the image now. Erase the parts that you don’t want, leaving texture only on the face or the desired area you want to texture. Leaving the texture all over the image will make it look very flat.
Another thing that bothers me is the fact that the image is too orange, I want it to give it a dead look. Create a hue/saturation layer above all this and play with the settings (I used these settings: hue: +170 and saturation: +29 then set the blend mode to “soft light”).
One more thing needs fixing now…there are some light areas in the background with seem distracting to me, so I just created a new layer above everything used the brush tool to paint those black.
That’s it… Now go and have fun…and remember “experimenting is the key”.


