Panoramic Photos
One sure thing to do when enjoying the outdoors is to take panoramic shots. You don’t need a wide-angle lens to capture the vast expanse of outdoor landscape photography. A technique I and many other photographers utilize is to take overlapping shots of a landscape and merge them later in Photoshop.
You will be required to shoot a series of images of a landscape. The trick to shooting your series will be to shoot all of your images on the same plane or on the same level. To do this you must be incredibly conscious of the height your camera is held at (one way might be to use a tripod.) The other trick is to be conscious that each image slightly overlaps. You may also choose to shoot your image by overlapping above and below. Your finished image will be somewhat like a collage or puzzle in which all of the pieces fit together. Try and choose a scape that has some dynamic features, rich textures, or contrasting colours/values.
First, let’s go over some tips for when shooting these types of photos.
- Be sure to overlap each shot about a quarter of the previous shot. We should avoid any blank areas in between obviously.
- Before the first shot, take a photo of something unique, like your hand. After the last shot of the series, do that same thing. This way, you know which shot if the first in the panoramic series and which is the last, when you later browse the folder on your computer.
Your Task
You will be expected to shoot a series of images (5) to make up one landscape series - (1) with nature and (1) with a building/structure incorporated. The trick to shooting your series will be to shoot all of your images on the same plane or on the same level. To do this you must be incredibly conscious of the height your camera is held at (one way might be to use a tripod.) The other trick is to be conscious that each image slightly overlaps by tracking what is in the right side of your frame when moving left to right or by tracking what is in the left side of your frame when moving right to left. You may also choose to shoot your image by overlapping above and below. Your finished image will be somewhat like a collage or puzzle in which all of the pieces fit together. Try and choose a scape that has some dynamic features, rich textures, or contrasting colours/values. After you have shot your images download them from the digital camera and save them to your z: drive in a folder called "Panorama". Your final assignment will be integrated seamlessly using Photomerge, which can be found under the File drop down menu on Photoshop. In Photomerge you will have the option to browse and find your images on the z: drive the program will set them in order and you will have to play with the images to make them blend.
Your finished images will by a dynamic recreation of a panoramic scene. Ideally your image will have no evidence of digital manipulation. Your series of images will look as if they were originally together in one image. Save your final image as Panoramic Nature & Panoramic Structure under your z: drive in the FINAL IMAGES --> Panaoramic folder. Use your Name as the folder name you are handing everything in.
- Start by shooting a series of images of a landscape (5). Try and choose a scape that has some dynamic features, rich textures, or contrasting colours/values.
- Remember to shoot all of your images on the same plane or on the same level - use a tripod.
- Make sure each image slightly overlaps by tracking what is in the right side of your frame when moving left to right or by tracking what is in the left side of your frame when moving right to left. If you choose to ho above the horizon line the same applies (be sure to overlap)
- After you have shot your images upload them from the camera and scanner and place them in your z: drive in a folder called "Panorama".
- Your final assignment will be integrated seamlessly using Photomerge, which can be found under the File drop down menu on Photoshop. In Photomerge you will have the option to browse and find your images in the z: drive the program will set them in order and you will have to play with the images to make them blend.
- In Phtotomerge you will have to adjust contrast, size, colour and any other elements that do not blend seamlessly between your images.
- It may be necessary to soften the edges of your picture edges with the clone tool
- Change the scale and lighting of the each image to suit the next image in the series, it is important that the each image’s proportion relates directly to the the next. Photomerge will help you do this by displaying images with various opacities.
- Scale: When changing the scale click and drag on a corner handle of the image while pressing shift in order not to distort your image.
- Lighting: Use enhance, contrast and variations to match the lighting of the images.
- Colour can be adjusted to integrate images using Enhance, Variations.
Your finished images will by a dynamic recreation of a panoramic scene. Ideally your image will have no evidence of digital manipulation. Your series of images will look as if they were originally together in one image. Save your final image as Panoramic Nature & Panoramic Structure under your z: drive in the FINAL IMAGES --> Panaoramic folder. Use your Name as the folder name you are handing everything in.
Hand in
- Your original images - 2 sets of 5 images for each panoramic
- Both of your final panoramic images combined and adjusted in PhotoShop
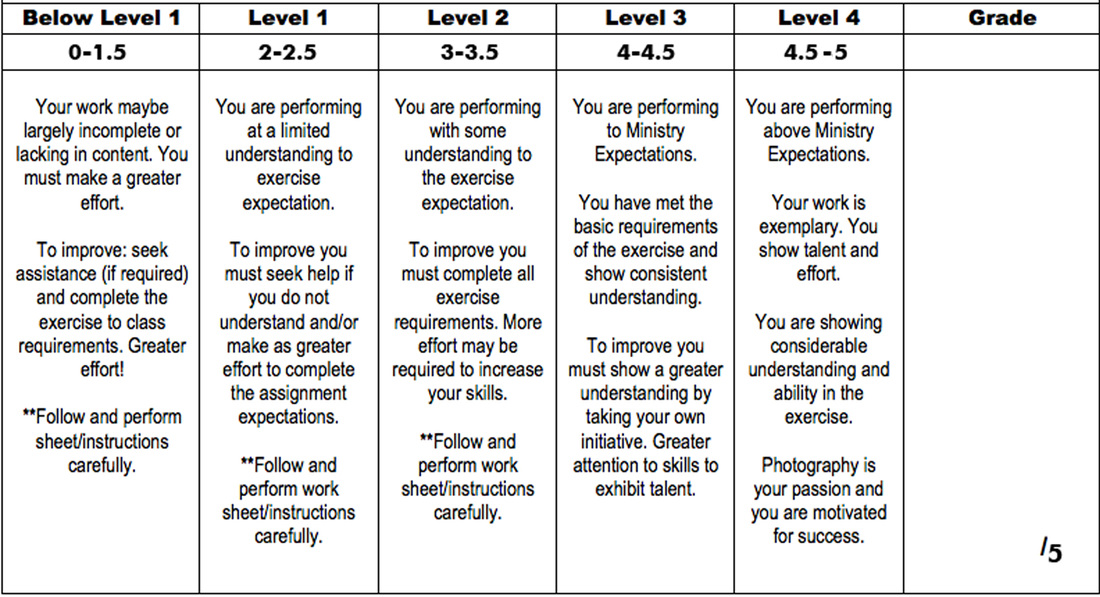
Rubric
Photomerge Photoshop Tutorial
Photoshop features a powerful stitching tool to create panoramas from a series of photographs. In this Photoshop tutorial, you will learn how to use the Photomerge tool in Photoshop CS3 to stitch a series of photos into a panorama.
Support Files
Before we start, download this file that contains six images that you will use to follow this tutorial.
|
| ||||||||||||
Step 1
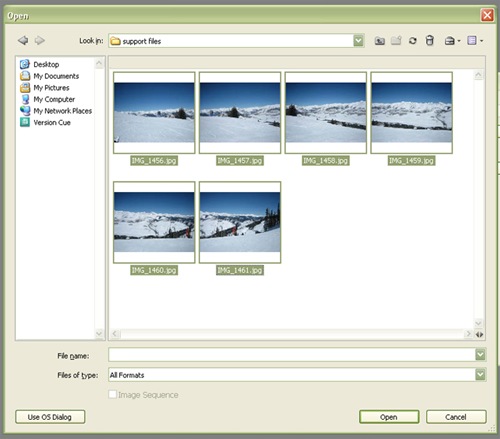
Go ahead and start up Photoshop CS3. Here’s six images (above) that we’ll be using from the support files.
Step 2
Go to File>Automate>Photomerge.
Step 3
A dialog will open that lists a few different options. “Auto” tells Photoshop to choose the best setting and apply it. It has less flexibility, but is quick and to the point. “Perspective” sets the image in a perspective that includes less barrel distortion, while “Cylindrical” has more barrel distortion. “Reposition Only” simply does that—repositions the images but doesn’t change the perspective. “Interactive Layout” allows a few more options, so let’s choose that.
step 4
Click Browse and select the images from the support files by clicking-and-dragging over them in the dialog. Click OK and the images will now be listed in the dialog. If we had already had the files open, they would already be listed there. Click OK to merge the photos.
step 5
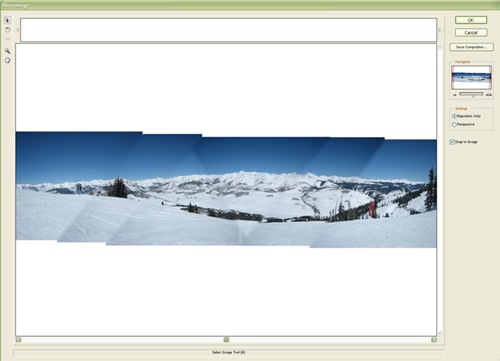
The Reposition Only option shows how the photos would look like if they were just copied and pasted next to each other.
step 6
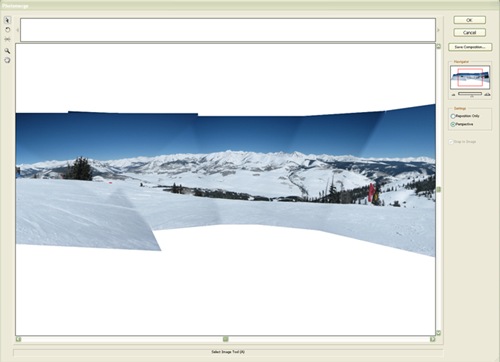
Clicking the Perspective option on the right adds perspective to the photo, rather than a “flat” look.
step 7
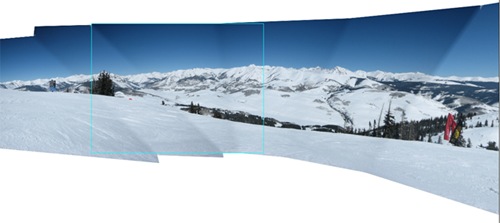
The tools on the left side let you select and move the photos (the selection tool), move the view around (the move view tool), and the rotate and zoom tools let you rotate and zoom into the photos. The other one is the set vanishing point tool, which can be used when perspective is selected. Click somewhere to set the vanishing point. This example shows moving the vanishing point to the side of the photo.
step 8
I pressed Ctrl-Z (Mac: Cmd-Z) to undo that tool. Select either perspective or reposition only and press OK to merge the photos.
step 9
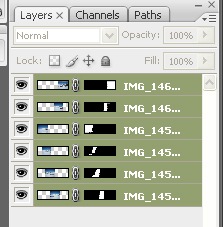
Notice how each layer is a partially-masked photo.
step 10
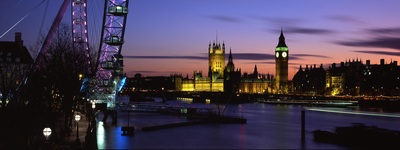
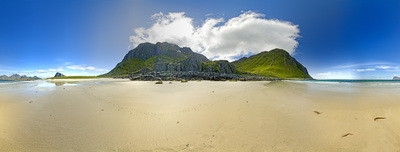
Using the photomerge tool is a great way to create breath-taking landscape photos. Here’s a few more examples (Click on images to enlarge).
THE END


